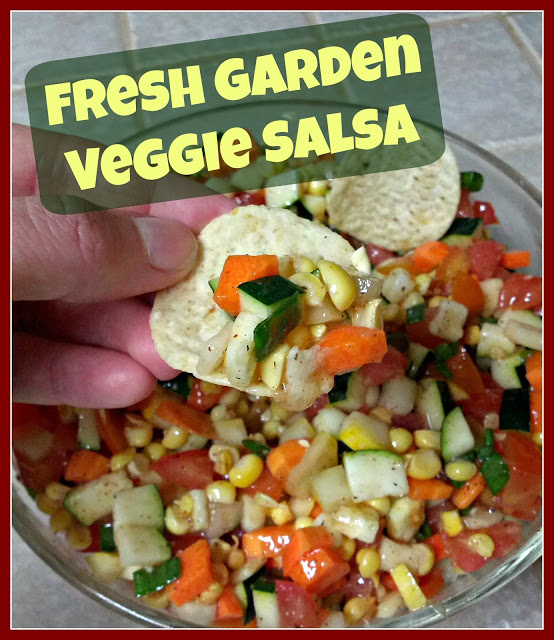
Fresh Garden Veggie Salsa


We all know that the most nutritious way to eat vegetables is raw, but I can only eat so many raw vegetables before getting tired of crunching. I also happen to have SO MANY fresh veggies coming in from the garden right now that I am having trouble making sure that none go to waste. And since I can only freeze and can for so long...here is a fantastically delicious way to enjoy all of those fresh garden veggies raw!

The best part of this recipe is that you can mix and match using almost any of the vegetables that you have available in the garden. I have made this recipe using all kinds of different vegetable combinations, and it always turns out addictingly delicious.


Here is what I used this time:
- 2 carrots, chopped
- 1 yellow squash, chopped
- 1 zucchini, chopped
- 1 large tomato, chopped
- 1 cucumber, chopped
- 2 small ears corn, cut from the cob
- 2 green onions, chopped
The Sauce:
- 1/4 cup Italian dressing
- 1 tbsp lime juice
- 1/2 tsp garlic salt
- 1/2 tsp pepper
- 1/2 tsp chili powder
- 1/2 tsp hot sauce
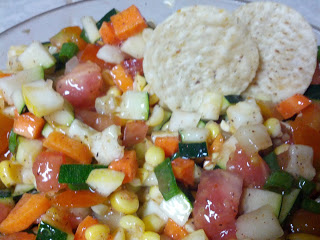
Chop all of the vegetables into small pieces so that they can easily fit on a chip. This step does take a while, but trust me, its worth it!

Mix the sauce together in a separate bowl, pour it over the vegetable combo, and mix well.

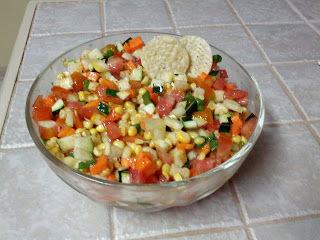
Now eat it with chips. Try not to eat the whole bowl in one sitting. It will be a challenge!

 The best part about this recipe is that you really can use whatever you happen to have around. Some other good ingredients that I have used and like are bell peppers, onions (white, yellow, or red), canned beans (rinsed well), and even some fruit such as mango or vine peach. The combination possibilities are endless! Enjoy :)


DIY Seed Starter Shelves


Two years ago I began starting my vegetable plants by seed. This has significantly cut my gardening costs even while increasing the number of plants each year, so there is no going back to buying seedlings from the home and garden center.

This first year I kept the seed trays outside. I kept them on the shelves of some old rolling TV carts (the ones they used in public schools when I was little) and I rolled them into the sun each morning and back under the carport each night. We live in Louisiana and we had an unusually mild winter, so most of the seedlings did okay. 

Last year I decided to keep them all inside as it was an unusually cold winter. It was an impromptu set up to say the least. I put a vinyl tablecloth over the dining room table and covered the whole thing with six packs in flood trays to catch the water. Then I positioned every lamp in the house between the flood trays to get as much light to them as possible. After not using the dining room or any lamps for two months, we had a little better success with the seedlings, but still not phenomenal. 

This year I decided to bite the bullet and invest the money in actually build a seed starting system that gives the seeds everything they need for the strongest start possible. I look forward to seeing how this new set up affects the yields once the vegetables start coming in. 

All things considered it wasn't a very expensive endeavor. I used some plastic stackable shelves that I had in the greenhouse, so the frame was already there. If you don't have shelves already and don't want to buy a new set, you can always create a custom frame out of 2x4's. Since this is going in the spare room that has carpet, I put down a vinyl tablecloth for easy clean up in case there are any leaks.


I then bought three hanging fluorescent work light fixtures for $12 a piece and six daylight fluorescent bulbs for $5 a piece. The fixtures already came with chains, but I had to add S hooks. Instead of running back to the hardware store, I just made my own out of a metal clothes hanger. I hung the lights as low as they will go to start off with and plugged them all in to a power strip so that I can turn them all on and off at the same time. Now all I need are the plants!


I bought these barbeque trays from the dollar store last year to use as flood trays, and they work great, especially for the price! I can fit 5 six packs on each one, and this allows me to water the plants from the bottom rather than the top.


I used seed starting mix to put in the six packs. The Jiffy Organic is awesome and not very expensive (about $5 per bag). For the six packs, I used some old ones that I had kept from last year and disinfected them.

Lower the lights all the way so that they are close to the plants! And I'm not sure if you can see in the picture, but I label each six pack with a plastic knife and a Sharpie. For some reason I always have the knives left in those mixed boxes of plastic utensils and they work perfect for this!


This set up has worked so amazingly, I just have to share the progress! I will show you the progress of just one of the six packs to give you an idea- I planted the Roma tomato seeds on Jan. 10, and the first ones sprouted after only 6 days. Here is the growth over the first few weeks.

Jan. 18

Jan. 19

Jan. 21

Jan. 28

By Jan. 31 I had to transplant them into 4 inch pots after only 3 weeks! At this point, I am hoping the weather warms up soon or I'm afraid I'll have a full container garden inside my house! 

How to Make Sun Dried Tomatoes


Around this time of year there is an abundance of tomatoes coming from the garden, and sometimes you have to be creative to find ways to use them up before they spoil. A new recipe I tried this year is sun dried tomatoes!

You will need:
- Tomatoes
- Thyme
- Garlic powder
- Salt
- Pepper
- Extra Virgin Olive Oil

First cut the tops off of the tomatoes and then cut them into halves or quarters depending on the size of the tomato. Gently squeeze the tomato pieces so that all of the seeds and liquid seed cavities come out. Lay out the tomato pieces with the skin side down on a cookie sheet lined with aluminum foil. Sprinkle on top the garlic powder, salt, pepper, thyme and extra virgin olive oil.


While sun drying them would be nice, our Louisiana humidity would probably make them more wet than they started out, so we are going to dry them in the oven. Bake them on low heat at 200 degrees for 3-4 hours depending on how fleshy your tomatoes are. You can also do this in a toaster oven to use up less energy. When they are done the skins will look wrinkled and leathery, and they will shrink up to half of their original size.


 If you aren't going to eat them all immediately, you can can them. Place the tomato pieces in a mason jar and pack them in tight. Then pour extra virgin olive oil until the tomatoes are completely submerged. The jar must be refrigerated and will stay fresh for two weeks or can be frozen for up to three months.


These taste delicious on crackers, sandwiches, pizza or pasta. Or you can eat the straight on a slice of cucumber (especially if you have a lot of those to eat up as well!).

What recipes are your favorites foe eating up fresh garden produce?