Pressure Canned Rabbit Vegetable Soup

Too much food! When I first started homesteading, I never thought I would have this problem, but right now we have so much produce coming in that I am overwhelmed! The easiest way to deal with excess is to freeze it, but our freezer is full to overflowing, so it is time to start canning. Canning is time consuming, and it can be a long process with a lot of steps depending on what you are making, but I can't tell you how wonderful it is to pull out a can of pre-prepped food to use later. I WILL remember to thank myself for all of this hard work later! 

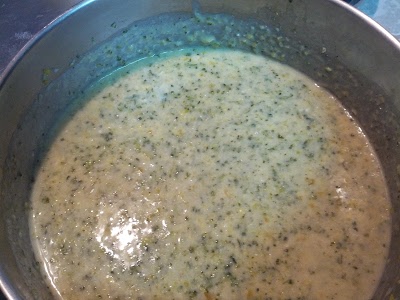
I decided to use up some of the meat and vegetables in the freezer to can a chicken noodle soup- except we raise rabbits for meat (and chickens for eggs), so in this case it is a rabbit noodle soup. Also, canning noodles is a no no, so we also leave out the noodles and simply add them in when we are ready to eat it. So really we are canning a rabbit vegetable soup.

Here is what you need:

- 3.5 quarts chicken stock (I used homemade rabbit stock)

- 4 cups rabbit, chopped

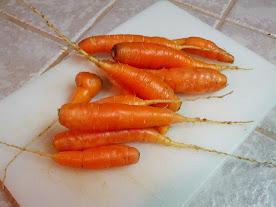
- 2 cups carrots, chopped

- 1 cup celery, chopped

- 1 cup onion, chopped

- 1 tsp salt

- 1/2 tsp pepper

- 1 tbsp garlic, minced

- 1 tsp basil (you can add whichever herbs you like)

Dump all of you ingredients into a large pot and simmer for about 20 minutes to blend all of the flavors together. This sounds quick, but all of that chopping takes time... 

Next use a slotted spoon to ladle the chicken and veggies into sterilized quart or pint jars. Fill each jar about halfway and then fill the rest of the way with broth, making sure to leave one inch of headspace in each jar. 

Put on the lids and rims, and process in a pressure canner for 75 minutes for pint jars or 90 minutes for quart jars. This recipe makes 4 quarts.


Vine Peach Apple Butter

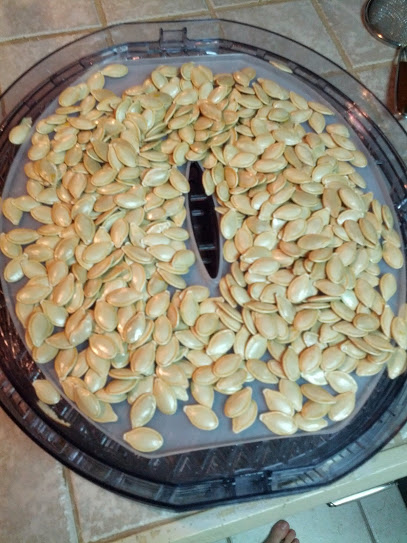
This is my first year growing vine peaches, and after lots of research trying to find recipes and having not much turn up, I decided to try a few concoctions myself. Vine peaches grow on a vine (very prolifically, I might add) in the summer, are the size of a small peach, bright yellow in color when ripe, and have a mild flavor. I had read that they can be used interchangeable with apples to make apple pie or apple butter.

And what better way to use my vine peaches than to make apple butter? I love making apple butter, and every time I can a batch, we eat through it in no time! It has the perfect mix of apples and cinnamon in a warm mash that makes me smile just to think about :) 

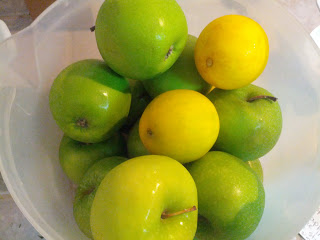
While vine peaches can be used interchangeably with apples in this recipe, I wouldn't use more than half as vine peaches because of their mild flavor (not quite as tasty as the granny smith apples) and they take a little longer to break down when cooking than the apples. If you don;t have any vine peaches, this recipe works just as well with all apples. In the picture below, you can see the size and color of the vine peaches in comparison to the granny smith apples.

Here's what you need:

- 4.5 lb. granny smith apples and vine peaches (combined- any ratio desired but I recommend more apples than vine peaches)

- 4 cups apple cider

- 2 cups sugar

- 1 1/2 tsp. ground cinnamon

- 1/2 tsp. ground cloves

- 1/2 tsp. ground all spice

- Canning jars and canning supplies

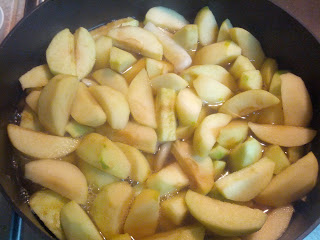
Peel, core, and cut the apples into wedges. For the vine peaches- peel, cut them in half, scoop out the seeds with a spoon, and cut into wedges. Boil the apples and apple cider on the stove for 30 minutes until tender. Puree the apples with a hand blender, or if yours is broken (like mine) the mixture should be soft enough to smash with a wooden spoon or potato masher.

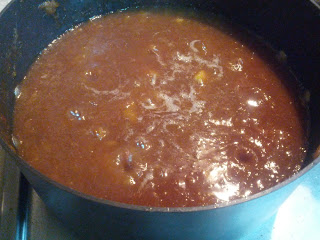
Add in the remaining ingredients, bring to a boil, and simmer until your desired thickness (about an hour and a half). 

You can eat it as is and keep it in the refrigerator, or can it for later. Ladle the mixture into sterilized jars*. This recipe makes 3-4 pints.

*To sterilize jars, place them upside down in a boiling water bath for 10-15 minutes. After closing the jars, wait until they cool, and the lids should pop down in the center to show that they are sealed. If any of the jars don't seal, just put them in the refrigerator and use those first. Sealed jars should be good for up to a year.

Yep, it really is that simple! And I love the way it makes my house smell when I make this stuff. If only there were a way to bottle up this smell! I guess I will settle for caning the taste :)

Spaghetti Squash Italian Sausage Bowls


I successfully grew my first harvest of spaghetti squash this year, and I wanted to use the first two to make something really special, so I went out on a limb and tried a new concoction of my own! I usually don't take those kinds of risks with vegetables have have limited produce, but I am so glad I did. This recipe is downright delicious!

What you need:
- 1 lb sausage of your choice (I used some local Cajun sausage that was awesome!)
- 2 medium spaghetti squashes
- 1 tbsp olive oil
- 2 lb. tomatoes
- 1/2 onion, diced
- 1/2 tsp salt
- 1/4 tsp pepper
- 1/2 tsp sage
- 1/2 tsp thyme
- 1/2 tsp oregano
- 2 tsp basil
- 1 tbsp minced garlic
- 1 bay leaf
- 2 oz pepper jack cheese
- 1 cup mozzarella cheese


1. Slice the stem off of the spaghetti squash and cut them in half lengthwise. Clean out the "guts" of the squash with a spoon (feed the seeds and center to chickens if applicable :).

2. Brush the inside of the squash with olive oil, and place them cut side down on a baking sheet. Bake at 400 F for 30 minutes until the sides of the spaghetti squash can just be scraped into noodle form with a fork.


3. While the squash is cooking, cut the sausage up into tiny pieces (the size of diced ham) and brown in a skillet with a little olive oil.  Add the onion, thyme, oregano, sage, basil, salt, pepper and bay leaf while it browns.


4. While waiting for the sausage to brown, prep your tomatoes. Place the whole tomatoes in boiling water for 2 minutes until the skins split and then transfer them to a bowl of ice water for 2 minutes. Peeling the skin off should be a breeze at this point! Cut off the ends, peel them, and quarter them.

5. Add the tomatoes to the sausage and herb mixture on the stove and simmer for 10-12 minutes until the tomatoes break down a little to form a sauce. Add the garlic and pepper jack cheese. Stir in the cheese until it is melted.


6. Scrape out some of the "spaghetti" from inside each of the spaghetti squash bowls and set aside. Ladle the sausage and sauce to fill each of the bowls halfway. Add the "noodles" back in to each bowl and fill to the top with more sausage and sauce. Cover the top of each bowl with mozarella cheese and bake at 350 F for 20-30 minutes until the cheese on top is melted and has a touch of golden brown.


You can garnish with fresh herbs. We enjoyed ours with steamed bush beans with fresh lime basil. Can I just say it was beyond delicious?! Who knew that cooking from your back yard could feel so gourmet?


Homemade Taco Seasoning Mix


When I think about how much money I spend on those little packets on seasoning mixes, it makes me cringe. Not to mention that I don't really know what is in them. After looking at several recipes for DIY taco seasoning mix, I decided to give it a try and see if I could taste a difference. 

Here is what I discovered...
1) This stuff is so easy to mix together
2) The flavor is so much better that the packets!!!
I will not go back to the store bought stuff. Ever.


There are lots of seasoning combinations out there, but here's the recipe that I settled on.
What you need:
- 1 tbsp chili powder
- 1 1/2 tsp cumin
- 1 tsp salt
- 1 tsp pepper
- 1/2 tsp paprika
- 1/2 tsp oregano
- 1/2 tsp garlic powder
- 1/4 tsp onion powder
- 1/4 tsp cayenne pepper


Simply mix all of the ingredients together and store in an airtight glass container. Feel free to make several batches to fill whatever size container you use. Use 1-2 tbsp of mix per pound of meat depending on how seasoned you prefer it. Let me just tell you- you will taste a huge difference. This recipe is so packed with flavor! I just love finding better ways to do things, and less expensive with more flavor seems like a double win to me :)

DIY Mint Extract


Last spring I bought a few tiny mint plants and put them on the edge of a raised bed in my vegetable garden. I heard that mint grows easily...aka is very invasive and aggressively takes over everything. In the fall it was out of control and I pulled it all up. Or so I thought. It came back- this time growing between the bricks in the pathway. That's ok, I thought. It smells nice when I step on it, and it isn't taking up any garden space. Wrong. It has sent its runners into every adjacent garden and is now impossible to get rid of. So this morning I pulled a bunch up (1 lb. to be exact- yes, a full pound of mint, and that doesn't even put a dent in it) and decided to make something useful out of it.

Mint extract!

The process is very simple. 

1. Pull up the overwhelming amounts of mint taking over your yard.


2. Pull off all of the leaves that don't have brown spots or edges.

3. Wash the leaves and dry them using a salad spinner.


4. Put the leaves into a glass jar and crush the leaves to release their minty goodness. I used a butter knife to pierce and crush them.


5. Pour Vodka over the leaves until they are covered.  Seal the jar, give it a good shake, and place it in a cool dark place for six weeks (remembering to shake it every now and then).


6. Strain the leaves out of the mixture and use as you would mint extract bought from the store!

I am looking forward to mint shakes, ice cream, and cookies! But mostly, I am looking forward to reclaiming my garden from the encroaching mint takeover...


Fresh Garden Veggie Salsa


We all know that the most nutritious way to eat vegetables is raw, but I can only eat so many raw vegetables before getting tired of crunching. I also happen to have SO MANY fresh veggies coming in from the garden right now that I am having trouble making sure that none go to waste. And since I can only freeze and can for so long...here is a fantastically delicious way to enjoy all of those fresh garden veggies raw!

The best part of this recipe is that you can mix and match using almost any of the vegetables that you have available in the garden. I have made this recipe using all kinds of different vegetable combinations, and it always turns out addictingly delicious.


Here is what I used this time:
- 2 carrots, chopped
- 1 yellow squash, chopped
- 1 zucchini, chopped
- 1 large tomato, chopped
- 1 cucumber, chopped
- 2 small ears corn, cut from the cob
- 2 green onions, chopped
The Sauce:
- 1/4 cup Italian dressing
- 1 tbsp lime juice
- 1/2 tsp garlic salt
- 1/2 tsp pepper
- 1/2 tsp chili powder
- 1/2 tsp hot sauce
Chop all of the vegetables into small pieces so that they can easily fit on a chip. This step does take a while, but trust me, its worth it!

Mix the sauce together in a separate bowl, pour it over the vegetable combo, and mix well.

Now eat it with chips. Try not to eat the whole bowl in one sitting. It will be a challenge!

 The best part about this recipe is that you really can use whatever you happen to have around. Some other good ingredients that I have used and like are bell peppers, onions (white, yellow, or red), canned beans (rinsed well), and even some fruit such as mango or vine peach. The combination possibilities are endless! Enjoy :)


Spiced Carrot Zucchini Bread


Right now in south Louisiana I am in full garden harvest mode. I haven't had much time to post because there are so many projects going on. I am lucky just to keep up with all of the produce coming in from the garden much less made nice posts about it. I will try to do a better job in the future :) 

One of the downsides to canning is that you spend lots of time in the kitchen, but don't have anything to eat at the end of it. I know I will be glad that I canned all the tomatoes and pickles later in the year, but for now, I need some kind of edible reward after all this work in the kitchen! Here is a quick bread recipe to whip up that tastes awesome AND uses up some of the overwhelming amounts of garden produce rolling in to your kitchen.

What you need:
- 2 1/4 cups flour
- 1 cup sugar
- 1 1/2 tsp cinnamon
- 3/4 tsp baking soda
- 1/2 tsp baking powder
- 1/2 tsp salt
- 1/4 tsp ground cloves
- 3/4 cup chopped carrots
- 3/4 cup chopped zucchini
- 1/2 cup chopped walnuts (optional)
- 2/3 cup vegetable oil
- 1/2 cup milk
- 2 eggs, beaten


Spray a loaf pan non-stick cooking spray and preheat the oven to 350 degrees F. Combine all of the dry ingredients in a large bowl and then add in the remaining ingredients until well mixed. Pour the batter into the pan and bake for 60 minutes until cooked through. Let the loaf cool on a cooling rack and enjoy! 


The pictures on this did not come out great, but I don't mind so much because the bread came out AMAZING! You honestly can;t tell it has so many vegetables in it, but they make the bread come out very moist. The cinnamon and cloves give it just the right amount of spice to make it great for breakfast or dessert!

How to Freeze Fresh Carrots


I just picked the last of my fall carrots. Yes, I know it's May- good ole' mild Louisiana winters! I always plant the majority of my carrots in the fall. Some are ready by early winter, but others sprout late or just take forever to grow, so I let them stay over the winter and am rewarded with early carrots the next year (from January on). There were a few little scragglers left, so I pulled them all up and plan on dicing them up and freezing them for chicken pot pie! So here's how to freeze your own fresh garden carrots...


First wash the carrots well, peel them, and remove the tops. Next cut the carrots into whatever size or shape you are going to use them in. I will dice mine into quarter inch cubes for chicken pot pie, but you can slice them or keep them whole.


Now we will blanch the carrots. Blanching is a fancy word for boiling them in water for a few minutes to kill the enzymes in your vegetables that break down the nutrients over time. If you sliced or chopped your carrots, you will only need to blanch them for two minutes. For whole carrots, blanch for five minutes.


WHen they are finished boiling, strain the carrots and immediately plunge into ice water to stop the cooking as quickly as possible. Let them sit in the ice water bath for the same number of minutes that you blanched them for.


Finally, drain the carrots and lay them out in a single layer on a baking sheet. Put the baking sheet into the freezer for 12-24 hours until the pieces are individually frozen. This will help keep them easy to separate rather than freeze together in one giant clump. 


Put the pieces into a freezer ziplock bag, and you are ready for fresh carrots any time!

How to Freeze Fresh Strawberries


I love fresh strawberries in the spring! Unfortunately, like most berries, strawberries do not stay fresh for long. In order to enjoy them in salads and smoothies year round, I freeze them in gallon sized ziplock bags. Right now my freezer is literally packed with bags of strawberries, mulberries, and blackberries. I will probably eat just enough of them to make some room to add blueberries later next month. 

Freezing strawberries is very simple, but there is a process, so here it is!

First wash all of the strawberries thoroughly and make a "V" shaped cut in the top of each strawberry to take off the leaves at the top.


You can freeze the strawberries whole or sliced in a variety of ways, but I suggest slicing them in half lengthwise. This way they are still in big enough pieces to use on top of a cake or for dipping, but not so huge that they would take forever to chop up if I throw them in the blender for a smoothie. 


Lay out all of the strawberry slices on a baking sheet so that they do not overlap and put them in the freezer for 24 hours. This will allow each individual strawberry to freeze so you end up with a bag of separate berries instead of a giant frozen block of strawberries.


After waiting a day, simply put all of the strawberries into freezer ziplock bag and pull them out any time you want a taste of early summer!


Swiss Chard Pesto-Salsa


I have a lot of swiss chard in my garden right now, which means its time to find a tasty way to eat it. After making this recipe, I am so glad that I grew swiss chard! 


So this isn't a pesto like you would use on pasta, but it also isn't a salsa that you would eat with chips. It's a delicious in between like a...palsa...or salsto. Either way, it has a surprising and fresh taste that goes perfect on quesadillas!


Swiss Chard Pesto-Salsa

Ingredients:
5-6 oz swiss chard (about half a bunch)
1/2 oz fresh cilantro
1 tbsp. minced garlic
1 tbsp. lime juice
1 tbsp. hot sauce (I used Homemade Hot Sauce)
2 tbsp. pepitas
1/4 cup olive oil

So simple to make! Wash and dry the swiss chard and cilantro, and then chop everything together in a food processor to the desired consistency. Keep refrigerated.


We decided to use our first batch of pesto-salsa in rabbit quesadillas, and they were delicious! I was too hungry to take a very pretty picture, but two tortillas stuffed with rabbit, grilled onions, cheddar cheese, tomatoes, and swiss chard pesto salsa made an excellent meal! I kind of felt like I was eating at a fancy gourmet farm to table restaurant. Well, a girl can dream :) Enjoy!

Canned Citrus Cranberry Conserve

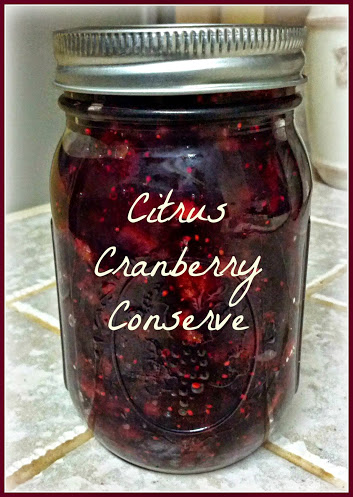
I had some leftover cranberries in the freezer that I have been meaning to get to and finally had some time today! I had enough for two different canning recipes- a whole cranberry sauce and a cranberry conserve! In case you have never had a conserve before, it is a chunky spread that is a mix of fresh fruit, dried fruit, and nuts. They go great on pastries, cheese trays, or a garnish for meats.

What you need:

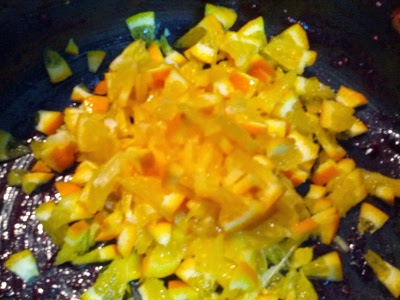
- 1 orange (with the peelings!), finely chopped and seeded

- 2 cups water

- 3 cups sugar

- 4 cups cranberries (fresh or frozen)

- 1/2 cup raisins

- 1/2 chopped pecans (can substitute other nuts if desired)

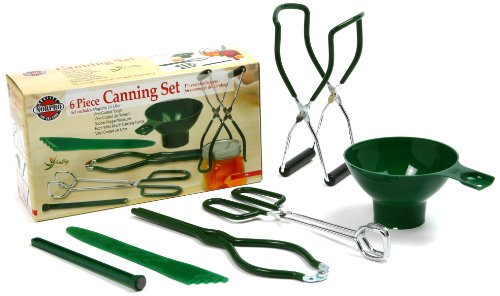
- Canning jars and lids and canning set

Combine oranges and water in a large sauce pan. Bring the water to a boil, then reduce the heat, cover, and simmer for five minutes until the peels soften. 

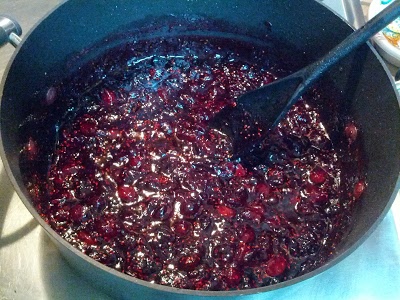
Add the cranberries, raisins, and sugar and stir until the sugar dissolves.

Return to a boil on medium high heat stirring constantly. Boil hard for 10-15 minutes until the mixture thickens. Remove from heat and do a gel test to see if it is ready. Stir in the nuts and continue to stir for 15 more minutes. Dip a spoon in and if the mixture sheets of instead of drips off then it is ready.

Ladle the mixture into sanitized jars leaving 1/4 inch headspace. Process jars in a water bath for 15 minutes. 

This conserve is sweet and tangy...just right!

Summer Herb and Veggie Quiche


I love this recipe for a summer quiche! It is so flavorful and goes perfectly with a fresh salad when you want a light, healthy, and garden fresh meal.

What you need:
- pie crust
- 1 bell pepper (green, red, or yellow), chopped
- 2 garlic cloves, minced
- 2 tbsp olive oil
- 2 tbsp. fresh basil (if you want to kick it up a notch, use lemon basil!)
- 4 eggs
- 1 cup milk
- 1 tsp. salt
- 1/2 tsp. pepper
- 2 cups cheddar cheese (or pepper jack, depending on your preference)
- 1/3 cup parmesan cheese
- 2 Roma tomatoes cut into 1/4 inch slices

Bake the pic crust at 425 degrees F for 10 minutes. Saute bell peppers and garlic in oil and stir in basil after 5 minutes.


Whisk eggs, milk, salt and pepper in a bowl. Stir in vegetables, cheddar cheese and parmesan. Pour the mixture into the pie crust.


Lay tomato slices on top of the mixture. Bake at 425 degrees F for 60 minutes. 


If you have more mixture than can fit in the pie crust, you can always use tortillas in muffin pans to make little snack sized versions!


I hope you enjoy the perfect blend of herbs, cheese, and fresh veggies in this great summer meal!


Stuffed Cabbage Rolls


When I started my first little kitchen garden, I would get so excited anytime I could use something I had grown as an ingredient in something I was cooking. The more I have expanded the garden, the more grocery store ingredients have been replaced by homegrown and handmade ones. This recipe is a great example of making a meal with almost every ingredient straight from the yard! Oh, and they're delicious :) I hope you enjoy these savory stuffed cabbage rolls!

What you need:
- 16-20 large cabbage leaves (the ones on the outside of the head that you usually toss)
- 1 lb ground beef (or rabbit)
- 1 onion, chopped
- 2-3 carrots, chopped
- 1 cup cooked brown rice
- 1 tbsp dried parsley
- 2 tsp. salt
- 1/2 tsp. pepper
- 1 egg
- 24 oz. tomato sauce
- 1 tbsp. dried oregano
- 1/2 cup mozzarella (grated)

Steam the cabbage leaves on the stove- put the leaves in a few inches of water in a pot and cover with a lid for 10-12 minutes. While you're waiting for that, brown the ground beef, onion, and carrots. Once the ground beef is fully cooked add in the rice, parsley, salt, pepper, and egg.


Once the cabbage leaves are done, take them out and gently drain off the liquid. Use a knife to cut a "V" shaped slit in each leaf to remove the thickest part of the rib in each leaf. Next, scoop a few spoonfuls of the ground beef mixture onto the leaf.


Now tuck in the ends and roll it up! Place all of the cabbage rolls in a glass baking dish.


Next mix the tomato sauce and oregano together and pour it over the cabbage rolls. Cover it with aluminum foil and cook it in the oven for 90 minutes at 350 degrees (F). Right when you pull it out of the oven, sprinkle the cheese on top to melt and you're done! 


Delicious, garden fresh, and healthy stuffed cabbage rolls. I was able to use carrots, parsley, oregano, cabbage, and eggs all from our homestead. (If I had planned ahead a little better I could have also used rabbit meat, onions, and tomato sauce.) Now that's a meal I'm proud of! 

Pressure Canning The BEST Spaghetti Meat Sauce


I believe that my mother's spaghetti sauce recipe is the BEST in the whole world. It was my favorite food growing up, and when I was first learning to cook on my own in college I thought mine would never turn out as good as hers. When it did, I was thrilled! Now it is also one of DH's favorite dishes year round. I have tried to freeze some on several occasions so that I can pull it out when I have a spaghetti craving, but it nevers turns out even close to the same (I really don't recommend it). So naturally, my mom's spaghetti sauce was the first recipe that I tried out in my new pressure canner! It turned out beautifully!

What you need:
1 lb. ground beef
2 cups onion
12 oz. tomato paste
8 oz. tomato sauce
4 cups water
3 tsp. salt
1 tsp. pepper
2 tsp. dried parsley
2 tsp. dried basil
2 bay leaves
2 tbsp. brown sugar

Cook the ground beef and onion until all pink is gone. Add all of the other ingredients, stirring well together. Cook on low for 45 minutes. 

Prepare your pressure canner and jars. Fill the jars with hot sauce mixture leaving 1 inch of headspace at the top. Cook in the pressure canner for 90 minutes with the pressure required for your altitude (10 lbs. pressure for 1,000 ft. or less).

This recipe is in increments of 1 lb. of ground beef. When I 4x the recipe it is just enough to make 7 quart jars of sauce, which exactly fills my pressure canner. Multiply the recipe by whatever number you need to make or can.

Now you can serve delicious, homemade spaghetti sauce with just a twist of a lid any time you have the urge! What an easy way for a quick homemade meal when you just don't have the time :)


Delicious Rabbit Breakfast Sausages


Yes, we raise meat rabbits. And I will confidently stand by our many reasons for doing so. I have always found our rabbit meat lean and delicious, and then this week I discovered a new and amazing way to enjoy it- breakfast sausage!!!! It is so so so so so good! It's a good thing it's lean...

Here's how to make your own!

Ingredients: 
- 1 rabbit deboned and ground (prepping the rabbit is by far the most time consuming part if you are starting from a whole rabbit, but so worth it!)
- 2 tsp. salt
- 1 1/2 tsp. sage
- 1 tsp. pepper
- 3/4 tsp. nutmeg
- 1/2 tsp. cinnamon
- 1-2 granny smith apples, peeled and finely chopped
- vegetable oil


Mix the ground meat with the spices (the next five ingredients) and refrigerate overnight to let all of the meat soak up that awesome spice flavor! 


The next morning chop and add the apple. Form the meat into 3 inch in diameter patties and cook in a skillet with a little vegetable oil for about 5 minutes on each side until browned to your taste. My husband likes a quick but hearty breakfast, so we made a triple batch and froze the extra to be reheated in the microwave. This idea turned out awesome! Now we have a bug country breakfast every morning before work without making a mess in the kitchen.


This recipe may seem to have some strange ingredients (nutmeg, cinnamon, and apples?), but trust me, they are DElicious! Not dry at all, full of flavor, and so much healthier than sausages made from other meats. One more reason I love, love, love our rabbits!

P.S. If you are wondering why the scrambled eggs in the picture above are so orange (almost the same color as the orange juice), that's the beauty of free range chicken eggs! So much nutrition packed into those dark orange yolks! And yes, that is a buttermilk biscuit with homemade apple butter :) 
Don't worry, that recipe will come soon...

Garden Vegetable Cheese Soup


I love vegetable gardening in south Louisiana! Here it is, the end of January, and while the rest of the country is snowed inside, I am harvesting the last of my cauliflower, broccoli, and carrots. (Sorry, I don't mean to brag...) And since the temperatures are beginning to drop, it is a great time for a warm, hearty garden vegetable cheese soup! So if you aren't sure what to do with the last little broccoli side shoots, those stubby end of the season carrots, or that tiny cauliflower head that you thought would eventually get bigger (but didn't), then this is a great recipe to use up the last of your cool season crops!


What you need:
- 2 stalks celery
- 1 medium onion
- 3 garlic cloves
- 4 cups chopped carrots, cauliflower, and broccoli (the proportions of each are up to you or depend on what is left in the garden, and sometimes I add more than 4 cups- you can't have too many veggies!)
- 1/2 cup butter, melted
- 1/2 cup flour
- 3 cups chicken broth
- 1 tbsp. worcheshire sauce
- 1/2 tsp. pepper
- 2 cups milk
- 2 cups shredded cheddar cheese

Put all of the veggies through the food processor to the size that you want. 


Saute the first 4 ingredients in the butter in a 3 qt. pot. 


Add the flour, stir for 1 minute until smooth. Gradually add chicken broth, stirring as you go. Cover and simmer for 20 minutes. 


Add the worcheshire sauce, milk, cheese, and pepper and cook on low for 10 more minutes. 


 All done! Serve with a fresh green garden salad :) Enjoy!


Garden Vegetable Cheese Soup
Ingredients:
- 2 stalks celery
- 1 medium onion
- 3 garlic cloves
- 4 cups chopped carrots, cauliflower, and broccoli (the proportions of each are up to you or depend on what is left in the garden, and sometimes I add more than 4 cups- you can't have too many veggies!)
- 1/2 cup butter, melted
- 1/2 cup flour
- 3 cups chicken broth
- 1 tbsp. worcheshire sauce
- 1/2 tsp. pepper
- 2 cups milk
- 2 cups shredded cheddar cheese

Put all of the veggies through the food processor to the size that you want. Saute the first 4 ingredients in the butter in a 3 qt. pot. Add the flour, stir for 1 minute until smooth. Gradually add chicken broth, stirring as you go. Cover and simmer for 20 minutes. Add the worcheshire sauce, milk, cheese, and pepper and cook on low for 10 more minutes.

Cauliflower Mozzarella Sticks


I saw something that caught my eye on pinterest by The Iron You this morning- cauliflower breadsticks! I am a true skeptic when it comes to all of these recipes that sound so healthy that you just know they taste weird at best. This sounded like one of those. But I had been proven wrong with my recent experimenting with cauliflower alfredo sauce, so I thought I would give it a shot. Besides, I just harvested LOTS of cauliflower from the garden, and I had to make something for family night that my mom, who recently went gluten free, could enjoy with us. Solving two problems at once? Let's do this!

Cauliflower Mozzarella Sticks:
- 1 head cauliflower (about 3 cups of flowerettes)
- 1/2 cup mozzarella cheese
- 1 egg
- 1 tbsp. olive oil
- 1 tsp. garlic cloves
- 1/4 tsp. salt
- 1/4 tsp. pepper
- 1/4 tsp. dried basil
- 1/4 tsp. dried parsley
- 1/4 tsp. dried oregano


Cut the cauliflower into pieces and chop up into fine pieces in the food processor.


Microwave the cauliflower "rice" for 8 minutes until fully cooked. 
Put the cooked cauliflower in a tea towel and strain out all of the water (this step is important to get the right consistency later). You will really have to twist the towel to squeeze out all of the liquid. 


Mix all of the ingredients in a bowl together.


Spray the loaf pan with Pam and put the mixture into a loaf pan, pressing down until it is packed into the bottom of the dish.


Bake in the oven on 350 degrees for about 20-30 minutes until golden brown. Sprinkle a little bit more mozzarella on top and let it melt as the sticks cool. 


Once the sticks are completely cool, it will be easy to remove them from the loaf pan and use a pizza cutter to make slices. Enjoy with some marinara sauce!


So, how were they? O...M...G....delicious! I will have a really hard time eating steamed cauliflower ever again now that I know it can taste like this! While it doesn't have the consistency of a breadstick (fluffy and bready) it tastes awesome! The consistency is more like a hash brown, but full of herbs, garlic, and cheese! LOVE IT! Let's just say, DH will be lucky if there are any left for him to try when he gets home :)


Roasted Pumpkin Seeds


This recipe is so easy and dee-licious! I know, I'm just getting around to roasting the pumpkin seeds from the pumpkin from October, but at least I got to it before the new year. Before you throw away your decorative pumpkins next year, wait until after you make this tasty snack!

What you need:
- Pumpkin seeds from 1 pumpkin (about 2-3 cups)
- 1/3 cup Butter, melted
- Sea salt

First, the messy part- cut open the pumpkin and pull all of the seeds out of the slimy insides. Put the seeds in a strainer and wash them really well to get off all the slimy orange pumpkin pieces. (Optional: feed the rest of the pumpkin insides to the backyard chickens waiting for their treat).


Next, wait for the clean pumpkin seeds to dry. At first I laid them out on a baking sheet. After waiting for a few hours with not much progress (or patience on my part) I tossed them in the dehydrator on the sheet for liquids and they were crispy dry in less than half an hour.


No matter how you do it, once they are completely dry, toss the pumpkin seeds in 1/3 cup melted butter. Spread the mixture out on a baking sheet so that the seeds don't overlap. Well, do the best you can, they are slippery little things, and they love to overlap. Sprinkle the whole pan with salt to taste.


Bake on 350 degrees for 20 minutes until golden brown and crunchy. Once they cool off, go ahead and eat them by the handful! They are so good! Crunchy and salty, plus full of protein. DH and I love to sprinkle them on salads instead of croutons :) 


To keep them fresh and crunchy, store them just sitting out on the counter without covering them. I know this sounds strange (especially for us in our humid climate) but it definitely works. This tasty snack probably won't last a week, but they will stay good and crunchy for up to a week just sitting out on the counter. Hope you enjoy!!!

Homemade Hot Sauce


I had a bunch of peppers leftover from my mini pepper plants over the summer, and I have been debating what to do with them. I used some to make pepper jelly, but it was SO spicy. I tried adding just a few into a jar of salsa, and talk about some KICK! They were too hot to really do anything with, so I decided to make a batch of good ole' homemade Louisiana hot sauce :)


I adapted this recipe from one I found in the book Little House in the Suburbs (great book, btw).

What you need:
- 1/2 cup white vinegar
- 3/4 cup apple cider vinegar
- 1/2 cup tabasco peppers with the stems cut off
- 1 tsp salt
- 1/2 tbsp garlic

Simmer the salt, peppers, and vinegar for 5-10 minutes. Make sure to do this in a well-ventilated area.
WARNING: It is best not to breathe at all if possible during this step. If you must breath, you may want to put your shirt over your nose and mouth. You probably also want to turn off your AC or heater, because when that thing kicks on in the middle of the project and those potent fumes start swirling around, it's not good! (Not that I know from experience...)


Next, take the mixture off the heat, cover it, and let it cool. Take this time to air out the house. Or just go outside and take some deep breaths without feeling like your throat is burning.


Once it is room temperature, add the garlic and blend the mixture in a food processor until sludgy. When you open the top of that food processor, it is another good time not to breathe.


Then pour the sludge through a fine sieve to strain out all of the skins, pulp, and seeds.


Then pour it into a bottle and keep it refrigerated. It should stay good indefinitely! I made three batches, which gave me 1 3/4 olive oil bottles. I guess I could have measured it in cups before pouring it...oh well.


I was just curious to see if my chickens, who eat literally anything, would be interested in the leftover pulp. It smells so strong!


Yep, they ate it all...