DIY Rain Chain

Last weekend we put up gutters on the house and I wanted a creative and beautiful way to get the water from the downspout into the water barrel in my vegetable garden. What better than a rain chain? A rain chain is a decorative chain that directs the water down without too much splashing. Rain chains can be very expensive, but I'm bot inclined to spend much money garden decor... or anything really. So I began scrounging around the house for something that I could turn into a rain chain, and I found the perfect thing! 

Shower curtain hooks! 

I just happened to have two extra sets of shower curtain hooks in the back of a drawer. I think I got them at goodwill for $2 per set. You never know when you will need a set of shower curtain hooks, and it turns out that I needed them for this project!

They are perfect because they are metal, which means they are heavy enough to keep from blowing in the wind, they are made to go in the shower, which means they won't rust when wet, and they are hooks, which means it is really easy to link them together to make a chain.

This was really easy to make- it literally took about 15 minutes. I simply linked the shower curtain hooks together and used some wire to secure each connection so that they don't become disconnected in the wind (we do get hurricanes).  We hung it from the downspout and lined it up with the grate on the rain barrel.

I couldn't happier with the result! Not only is it beautiful and functional, but it also cost less than it would have to buy that ugly plastic down spout. Can't beat that!


Houmas House Plantation Gardens

DH was so sweet to take me on a day trip to visit the Houmas House Plantation and Gardens outside of Baton Rouge for my birthday! I love touring old plantation homes- the history, the odd contraptions they used to solve problems we never think about today, and the large self-sufficient estates. But the Houmas House was so much more than a usual tour because of the incredible gardens, and of course, I'm a sucker for breathtaking landscaping because I can appreciate how much work goes into it!


I wish I had gotten better pictures, but I wasn't planning on blogging about the trip until later thinking back on how wonderful the visit was! So just know that these pictures do not do justice to the beautifully crafted jungle of plants that cover the grounds.

The main house has an 8 oak alley. It used to be 24 oak but most were destroyed to make way for a levee along the Mississippi River. The gorgeous oak trees are literally all over the property, setting the frame for the gardens. The oldest trees span in age from 300-600 years old.


The oak tree all the way to the left has what looks like a fancy bird house it in, but it actually houses a huge bee hive where they make their own honey to sell in the gift shop. Love that!


A central circular pond is surrounded by 4 quadrants of gardens that include the vegetable gardens, vine covered walkways, formal gardens, and water gardens.


There are formal gardens with the typical trimmed hedges, symmetrical lawns, and Greek statues.


 The formal gardens have nooks and crannies with quaint seating areas, and even the flower gardens are dotted with edible plants such as dill, artichoke, broccoli raab, cabbage, and kale.


Does this picture look familiar??? Look closely... 


That's right, it is Monet's Water Lilies and Japanese Bridge paining! It even has a Japanese tea house from the top, from which the view is even more of a likeness to the painting. To see this reinvention of the well-known painting is like seeing art come to life! This pond and waterfall is just one piece of the elaborate water gardens that have fountains, flowing streams, and waterfalls that flow into a seeing of pools and koi ponds graced with Louisiana irises and water lilies. Simply breath-taking!


The vegetable gardens were fascinating to me! They use all of the food that they grow in the vegetable gardens in the kitchen for use in the restaurants on the property, which I love. 


They had gotten 11 inches of rain the week that we visited, so you will notice the water still puddled between the rows of vegetables.


The trellises are all formed from intertwined branches and vines creating an artistic yet natural look.


While the vegetables have an overgrown, natural look to them with interplanted crops and curved rows forming a variety of shapes and designs, there is still a visible order and intentionality to the plantings.


I also recommend the tour of the house. The view of the gardens and the property from the second story balcony and fantastic!


Overall, I wish I would have taken a thousand more pictures! What I have are the few that I quickly snapped at the end. I guess that is the sign of truly living in the moment and enjoying it- being so present where you are that is doesn't occur to you to preserve it for later. I hope you have the chance to visit. You will not be disappointed!

Small Space Vegetable Garden Techniques: Intensive Gardening

If you are like me and have a small space for your vegetable garden, or just want to get more out of the space that you have, an easy way to fit more plants in less space is to change the arrangement. When it comes to the vegetable garden, it becomes a game to see if I can increase production each year by learning new techniques, and I can get a little obsessed with getting the most I can out of the area. That's when the diagrams come out to find the most strategic plant arrangement possible...


Traditional gardens use rows with unused garden space between each row of plants for walking. Unless you have a large garden area, the rows in between the plants wastes a lot of gardening area. An average 3x6 foot garden planted with the traditional row arrangement will fit only ten plants that all for 12 inch spacing.
Another method commonly used in raised beds and backyard vegetable gardens is the square foot gardening method. In this method, the gardener lays out a grid in the garden with each square in the grid measuring one square foot. Therefore, in a 3x6 foot garden, you would be able to fit 18 plants. While this arrangement is a much better use of space, there are still unused areas in the corners of each of the squares that are not utilized.

Intensive gardening still follows the suggested plant spacing of 12 inches, but staggers the rows of plants to make use of the lost corner space in square foot gardening. The spacing for plants in this arrangement are measured at an angle, allowing even more plants to fit in the area. This 3x6 garden will hold 23 plants that require 12 inch spacing! 

More plants means more produce, and more produce means more yield from the space that you have. This is just one of many ways to increase your yields, but it is a very simple technique to implement in the backyard vegetable garden. I hope you have a very productive vegetable garden this year!

Spring into Fruit Trees!

I love spring! First of all, the weather is so nice and warm- all of nature is bursting with new growth and energy and you can't help but join in by rolling up your sleeves to dig in the dirt. My vegetable plants go in the ground early, but the first signs of spring are in the fruit department. This always gets me excited, because every flower equals one fruit that I will get to harvest and eat later! 

Fruit is so expensive to buy, but so good for you! We go through a lot of fruit at our house. One of the best investments in our yard has been putting in fruit trees. They easily pay back your investment after just a couple of harvests but will keep producing for years and years. Currently in our yard we have 5 blueberry bushes, Crabapple, Fuji apple, Baldwin pear, Hood pear, grapevine, blackberry vines, Meyer lemon, satsuma, grapefruit, kumquat, and pomegranate. I know it sounds like a lot, but we enjoy them so much that we just ordered 3 more dwarf trees! Here are a few of my favorite sights in spring...


Our Balwin pear bloomed for the first time this year, which means we will get our very first harvest of pears in late summer/ early fall. Some little pears are already forming!

The mulberry was our first fruit tree. Here are some little berries on our mulberry tree. Mulberries don't technically bloom- they have little curly hairs on them for pollination purposes. I don't mind as long as the tree is covered!

Blackberries everywhere! So many little flowers with bees buzzing all around to pollinate each one. I have let the vines take over the entire back fence and we will probably get about 8 lb. of berries this year. I can already taste the summer berry smoothies :)


Satsumas (a kind of citrus) will have a heavy production year followed by a light one. This is our heavy year, and the tree is absolutely loaded with blooms.

I just love the little purple flowers on the lemon tree. So dainty and cute! And they smell like honeysuckle :)

Blueberry bushes don't have very showy blooms, but look like little white bells. Our bushes are still young, but put out a good amount of berries.

These pink Fuji apple blossoms make me smile. This is another tree that we will get our first fruit from this year. So exciting!

What is blooming in your garden right now? Anything promising some delicious treats later? I just love that I'll already be enjoying fresh fruit while my vegetables plants are just getting rolling. Hello, spring! It's been a while...

Stuffed Cabbage Rolls


When I started my first little kitchen garden, I would get so excited anytime I could use something I had grown as an ingredient in something I was cooking. The more I have expanded the garden, the more grocery store ingredients have been replaced by homegrown and handmade ones. This recipe is a great example of making a meal with almost every ingredient straight from the yard! Oh, and they're delicious :) I hope you enjoy these savory stuffed cabbage rolls!

What you need:
- 16-20 large cabbage leaves (the ones on the outside of the head that you usually toss)
- 1 lb ground beef (or rabbit)
- 1 onion, chopped
- 2-3 carrots, chopped
- 1 cup cooked brown rice
- 1 tbsp dried parsley
- 2 tsp. salt
- 1/2 tsp. pepper
- 1 egg
- 24 oz. tomato sauce
- 1 tbsp. dried oregano
- 1/2 cup mozzarella (grated)

Steam the cabbage leaves on the stove- put the leaves in a few inches of water in a pot and cover with a lid for 10-12 minutes. While you're waiting for that, brown the ground beef, onion, and carrots. Once the ground beef is fully cooked add in the rice, parsley, salt, pepper, and egg.


Once the cabbage leaves are done, take them out and gently drain off the liquid. Use a knife to cut a "V" shaped slit in each leaf to remove the thickest part of the rib in each leaf. Next, scoop a few spoonfuls of the ground beef mixture onto the leaf.


Now tuck in the ends and roll it up! Place all of the cabbage rolls in a glass baking dish.


Next mix the tomato sauce and oregano together and pour it over the cabbage rolls. Cover it with aluminum foil and cook it in the oven for 90 minutes at 350 degrees (F). Right when you pull it out of the oven, sprinkle the cheese on top to melt and you're done! 


Delicious, garden fresh, and healthy stuffed cabbage rolls. I was able to use carrots, parsley, oregano, cabbage, and eggs all from our homestead. (If I had planned ahead a little better I could have also used rabbit meat, onions, and tomato sauce.) Now that's a meal I'm proud of! 

Garden Vegetable Cheese Soup


I love vegetable gardening in south Louisiana! Here it is, the end of January, and while the rest of the country is snowed inside, I am harvesting the last of my cauliflower, broccoli, and carrots. (Sorry, I don't mean to brag...) And since the temperatures are beginning to drop, it is a great time for a warm, hearty garden vegetable cheese soup! So if you aren't sure what to do with the last little broccoli side shoots, those stubby end of the season carrots, or that tiny cauliflower head that you thought would eventually get bigger (but didn't), then this is a great recipe to use up the last of your cool season crops!


What you need:
- 2 stalks celery
- 1 medium onion
- 3 garlic cloves
- 4 cups chopped carrots, cauliflower, and broccoli (the proportions of each are up to you or depend on what is left in the garden, and sometimes I add more than 4 cups- you can't have too many veggies!)
- 1/2 cup butter, melted
- 1/2 cup flour
- 3 cups chicken broth
- 1 tbsp. worcheshire sauce
- 1/2 tsp. pepper
- 2 cups milk
- 2 cups shredded cheddar cheese

Put all of the veggies through the food processor to the size that you want. 


Saute the first 4 ingredients in the butter in a 3 qt. pot. 


Add the flour, stir for 1 minute until smooth. Gradually add chicken broth, stirring as you go. Cover and simmer for 20 minutes. 


Add the worcheshire sauce, milk, cheese, and pepper and cook on low for 10 more minutes. 


 All done! Serve with a fresh green garden salad :) Enjoy!


Garden Vegetable Cheese Soup
Ingredients:
- 2 stalks celery
- 1 medium onion
- 3 garlic cloves
- 4 cups chopped carrots, cauliflower, and broccoli (the proportions of each are up to you or depend on what is left in the garden, and sometimes I add more than 4 cups- you can't have too many veggies!)
- 1/2 cup butter, melted
- 1/2 cup flour
- 3 cups chicken broth
- 1 tbsp. worcheshire sauce
- 1/2 tsp. pepper
- 2 cups milk
- 2 cups shredded cheddar cheese

Put all of the veggies through the food processor to the size that you want. Saute the first 4 ingredients in the butter in a 3 qt. pot. Add the flour, stir for 1 minute until smooth. Gradually add chicken broth, stirring as you go. Cover and simmer for 20 minutes. Add the worcheshire sauce, milk, cheese, and pepper and cook on low for 10 more minutes.

How to Harvest and Cure Sweet Potatoes


It's sweet potato time in South Louisiana! I love harvesting root vegetables because it's always a surprise. You know there is something under that dirt, but how big and how many??? It's time to excavate! My sweet potato bed this year was a 4x8 raised bed. This works great because it is easier to keep the vines contained (they will take over everything if you let them) but at the same time gives them plenty of space to produce a good crop.


 As you can see, my vines are still nice and green when I am harvesting. Some places will tell you to wait until the vines die down, which may be true up north, but here in the south that may not happen until January! For my area harvesting takes place a minimum of 120 days after planting. (To learn how to start your own sweet potato slips for planting, click here.)


 It's hard to tell in the picture, but you will start to notice the dirt at the base of each stem beginning to mound up in a little hill. This is because there are potatoes under there!


 To check and see if your sweet potatoes are ready, gently brush away some of the soil around the base of the plant and you should be able to see the tops of a few sweet potatoes. You can roughly judge their size and decide if it is time to harvest.


 Gently dig around the base of the plants to get the tubers out of the ground. I usually end up using my hands more than a shovel so that I don't knick the potatoes or accidentally break off the ends.


If you are lucky and have loose soil, you may be able to pull up an entire group all at once! After you have all of the plants pulled up, be sure to turn the soil throughout the garden really well. You will be surprised how many rogue sweet potatoes you will find hiding out! My garden will yield 15-20 pounds of sweet potatoes this year.


 Lay the sweet potatoes out on the dirt or path to dry for a few hours in the sun allowing any injuries to heal before brushing off the dirt and storing them. Once they are completely dry, they must be cured in order to have that sweet taste that we are all looking forward to.

Next, cure the sweet potatoes by storing them in a warm humid place for 7-10 days. It should be at least 80 degrees F. This isn't too hard to come by in Louisiana even in October- I just put them in a paper bag in the shed, greenhouse, or attic. Next, keep them at 55 degrees F for 4-6 weeks. While this may be easier up north, I will be keeping them in a mini fridge set to that temperature. The curing process helps trigger the sugar creating enzymes in order to have that sweet taste we are all looking forward to. After the potatoes have been cured, sweet potatoes will keep for several months without losing any nutritional value. Now its time to start collecting recipes!!!

Vegetable Starting Guide: Seeds or Plants?


So you're ready to begin a vegetable garden or try a new plant for the first time, but you aren't sure how to begin. Start seed indoors, direct sow, or buy transplants?

After years of experimenting with seeds and transplants, I have decided to make a handy chart to keep track of the vegetables that start out better with seeds started indoors, seeds directly sown in the ground, or bought from the store in a pot. Here is a little bit more on each of the options.

Direct Sow
I used to be completely intimidated by starting seeds directly in the ground. I'm way to much of a control freak to believe that sticking a seed in some dirt outside and walking away could ever produce anything edible, but after lots of trusting and trying, it has become one of the easiest (and cheapest) ways that I have found to begin most vegetables. Without direct sowing in the garden, you will greatly limit the number of different vegetable types that you can grow. It is much easier than you think, and at $1 per pack for most seed, the price is unbeatable for gardening on any larger scale.

All varieties of beans are a great seed to start with if direct sowing intimidates you. These seeds will come up fast and grow strong every time!


Seeds Started Indoors
Some plants need the extra time to grow before the weather warms up enough to go outside, especially in areas of the country with short growing seasons. Starting seeds indoors is a great way to give those plants a jump start. Simply plant your seeds in six packs or peat pots with potting soil. Some gardeners use a soil-less seed starting mix, but I find that a good potting soil almost always does the trick. Keep the soil moist, (the best way is by watering from the bottom) and keep them under LOTS of light. You don't want your seedlings to get long and lanky stretching for sunlight. Put them out in the sun as soon as possible.

Transplants
Some plants simply take too long to grow from seed to maturity in a single planting season, especially in colder zones where the growing season is short. There are also some plants that can be grown from seed, but with the amount of care and attention they need, it is just not worth it. In those cases, you will want to buy plants from your local nursery. When choosing plants, buy the smallest ones possible to keep your budget under control. Don't worry, they will be big soon! Look for plants that are low and bushy rather than tall and lanky.

Other
Other vegetables have special beginnings, such as potatoes, onions, garlic, and asparagus. They may be started from bulbs, seed potatoes, slips, leftovers from the kitchen, mature root stock, or sets that you buy from the store or order from a catalog. Do some research on these individual plants to find the best way to get the growing.


Sweet potatoes are grown from slips started from a seed potato.

And now for the handy chart! I hope this helps you as you expand your gardening horizons and try new plants. Some plants may have links that you can click on for more information on starting that particular plant.


Download: click here

Spring 2014 Garden Produce Review


Now that we have our new vegetable garden, we are trying a lot of new plants, experimenting with different ways to grow things, and have more space to play with producing our own food! We use growveg to do all of our garden planning and LOVE IT! If you haven't tried it yet, do yourself a favor and check it out, seriously.

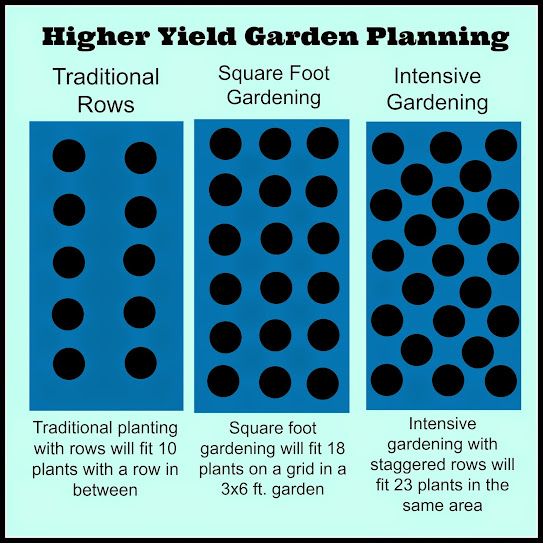
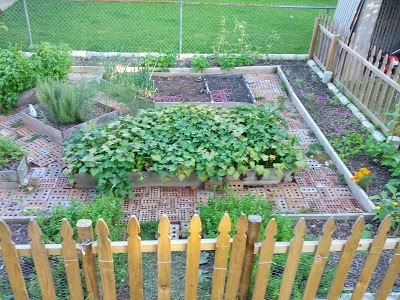
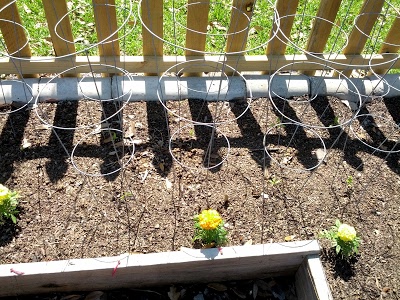
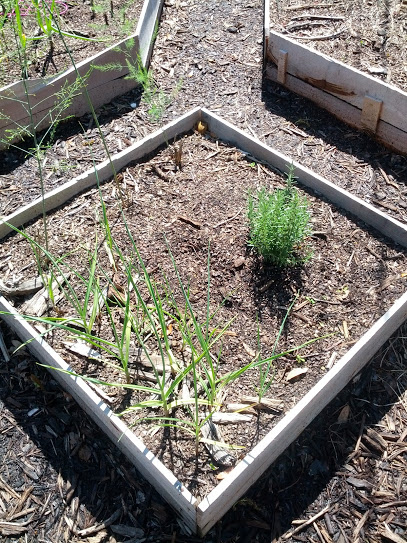
Here was our spring garden layout:


We'll let you know how each plant did, any trouble shooting we had to do, and any changes we plan on making for next time. Just FYI, we are in south central Louisiana, which is a hot and humid Zone 9a. Our advice may not apply to your area!

Turnips:
# of Plants/Area: 2 sq. ft.
Produce: 1lb4oz
Prepared: Roasted and delicious!
Notes: This was our first time planting turnips, and I wasn't expecting much to happen. But we planted seeds on Feb. 1, and they did great!
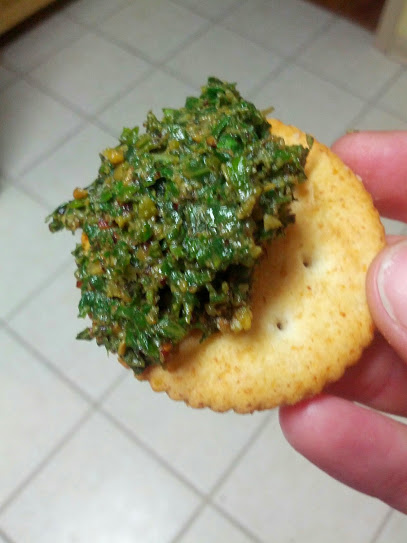

Basil:
# of Plants/Area: 4 plants
Produce: 15 oz. dried and 7 cups fresh, More than we could handle!
Prepared: Basil Mint Pesto, Basil Parsley Pesto, Dried Basil
Notes: I started these plants from seed in pots. I spent most of the summer trying to figure out how to use our HUGE amounts of basil. I couldn't think of enough ideas to handle the volume!
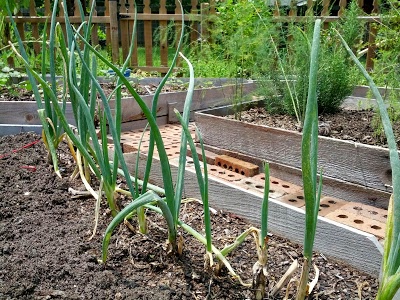
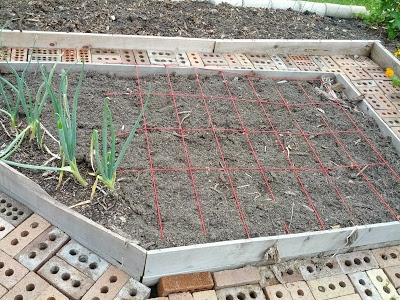

Green Onions:
# of Plants/Area: 10 plants
Produce: Used all season without running out!
Prepared: Gumbo, baked potatoes, fresh veggie dip
Notes: We started these from leftovers we bought at the grocery store, and they have produced for us all season without running out. Find out how to start your own here. So simple!


 Parsley:
# of Plants/Area: 4 plants
Produce: 2 cups fresh
Prepared: Basil Parsley Pesto, Dried Parsley, Gumbo
Notes: I started these plants from seeds in pots. The parsley doesn't produce as much per plant as we use, so I will plant more next year!
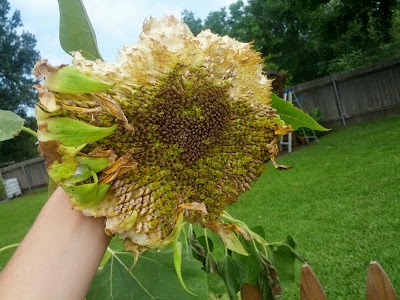
Sunflowers:
# of Plants/Area: 5 plants
Produce: 1/2 cup sunflower seeds
Prepared: Basil Mint Pesto
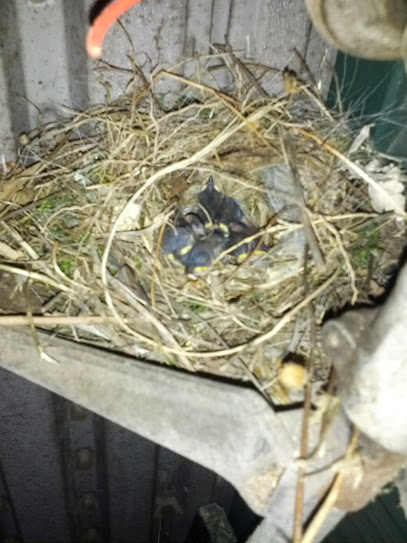
Notes: I direct seeded these in the bed. They were more for attracting bees and giving the birds a snack than anything else. But it doesn't hurt to get a little produce from them as well!


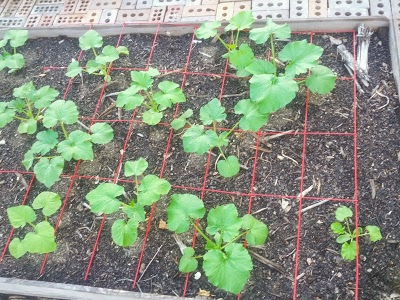
Zucchini and Summer Squash:
# of Plants/Area: 5 plants
Produce: Yellow summer squash 15oz, Zucchini 7lb 13oz
Prepared: Zucchini lasagna, Carrot Zucchini bread, Zucchini Blueberry bread, Pickled zucchini, and sauteed Squash
Notes: I direct seeded these in the raised bed, and they all sprouted. If you have trouble with squash vine borers or powdery mildew on your summer squash plants, check out the posts we have for those issues.


Garlic:
# of Plants/Area: 8 plants
Produce: 3oz
Prepared: Minced
Notes: I started this garlic from grocery story leftovers. Find out how to start your own here. I was surprised what a good harvest I got from the spring, when garlic grows best when started in the fall. I will be growing this again!
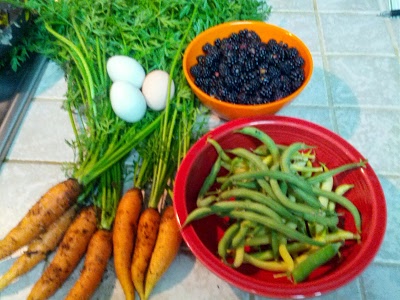

Beans:
# of Plants/Area: Bush beans- 20, Pole Beans- 10, Soy beans- 12, Lima beans- 6
Produce: Bush beans- 8lb 3oz, Pole Beans- 4lb 3oz, Soy Beans- 2lb 6oz, Lima beans- 2oz
Prepared: Steamed, Pickled, Relish, Raw :)
Notes: The bush beans, pole beans, and soy beans had huge produce, but the lima beans must have not liked their spot. They never did get going, but I had more than enough beans from my other plants!


Radishes:
# of Plants/Area: 2 sq. ft.
Produce: 2 oz.
Prepared: Chopped up raw in salads
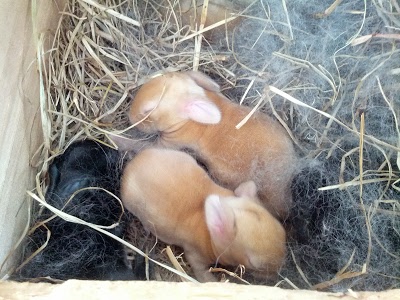
Notes: We aren't big radish eaters, but they are fun to grow because they mature so quickly. Besides, the rabbits LOVE the greens, so it's worth it to give them a treat.


Carrots:
# of Plants/Area: 4 sq. ft.
Produce: 3lb. 2oz.
Prepared: Steamed, Pot Roast Stew, Carrot Zucchini bread, Raw in salads
Notes: I will definitely plant more carrots next year! These were easy to grow and we eat a lot of carrots!
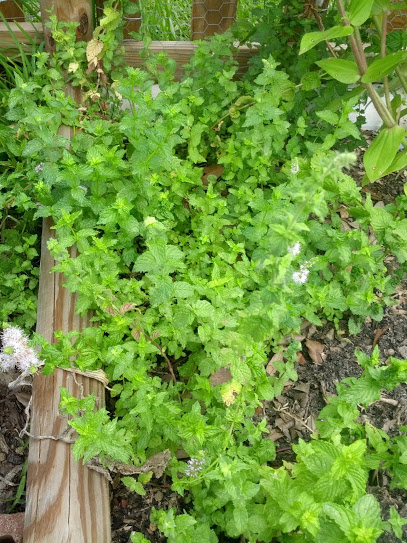

Mint:
# of Plants/Area: 6 plants
Produce: 2 cups fresh was all I used!
Prepared: Basil Mint Pesto
Notes: I was warned to plant this in a area where it could take over, and they were not kidding! We have more mint than we know what to do with, and I will be digging up a bunch to feed to the rabbits at the end of the season. I definitely won't plant more than one pot of this next year!


Blackberries:
# of Plants/Area: 20ft. row wild blackberry vines along the back fence
Produce: 7lb
Prepared: Blackberry lemonade, Summer Fruit Smoothies
Notes: We freeze gallon size bags of blackberries every spring, and they never make it through the year. They grow wild, and we love our blackberries!
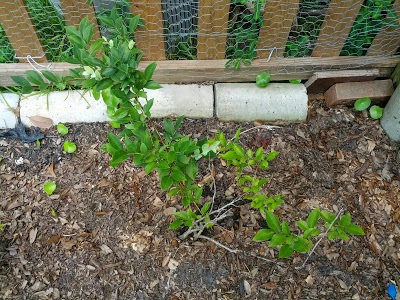
Blueberries:
# of Plants/Area: 5 small bushes
Produce: 8oz.
Prepared: Blueberry pancakes, Blueberry Zucchini bread, Summer fruit Smoothies, Blueberry Jelly
Notes: We use about 20 lb. of blueberries a year and we usually pick them at a local blueberry farm. This was our first year to start a few bushes of our own, and we are looking forward to production picking up as they grow! Not bad for a first year though.
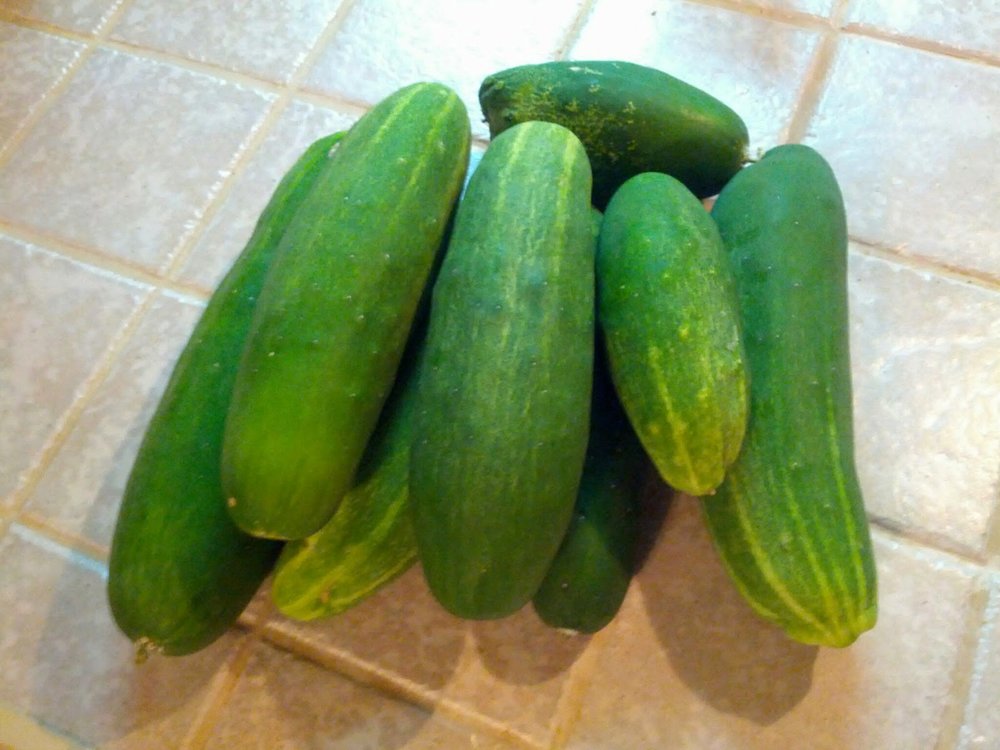

Cucumbers:
# of Plants/Area: 10 plants
Produce: 22lb. 11oz.
Prepared: Raw, In salads
Notes: More cucumbers than we could eat and give away! And they were so fresh :)

Tomatoes:
# of Plants/Area: 10 plants
Produce: 6oz
Prepared: Sun Dried Tomatoes
Notes: Out tomato plants did awful! Out of ten plants we only picked 5 tomatoes! I'm not sure what went wrong, but the flowers kept falling off before setting fruit. It's the first time I've ever had that problem. I'm disappointed, but will try again next year.

Beets:
# of Plants/Area: 1 sq. ft.
Produce: 1lb.
Prepared: Caramelized beets
Notes: This was our first time growing beets, and I was not sure what to expect, but was pleased with the produce and the taste.

Corn:
# of Plants/Area: 20 plants
Produce: 8oz
Prepared: steamed
Notes: The corn did not do well. I'm not sure if I planted too late, or if the soil wasn't deep enough, but it just never took off.

Peas:
# of Plants/Area: 4 sq. ft.
Produce: 1lb. 8oz.
Prepared: None of them made it out of the yard, we ate them all raw right in the garden!
Notes: There is nothing like fresh peas- they taste like candy!

My goal for the spring was 50lbs of produce, but our total came to 64.7lb! When we calculated the value (based on local grocery store prices) the total came out to $165.00 worth of produce we grew in our own backyard over the course of seven months!

How was your produce this past season? Any tips for getting more out of the area?

Perfect Backyard Vegetable Garden Plan: Feed Your Family Fresh!


Last year my vegetable garden was a 6" high raised bed that was 5' x 15'. It worked for a while, but the soil wasn't very deep since the bed wasn't as raised as much as I would have liked, and a nearby tree had grown so quickly that it blocked the afternoon sun to half of the garden which simply won't work for growing a harvest of summer vegetables. So last year I began designing my dream garden on paper, not really sure if it would ever become a reality. We dreamed big, but wanted to keep it as budget friendly as possible.

I used growveg to make my original garden design. I am absolutely in love with this software! It has made my gardening SO MUCH EASIER! As much as I like researching and charting, this makes the planning a dream! (try the 30 day free trial, and you'll know what I mean!) 

This was the plan for the spring 2014 layout. 28' x 20' with five raised beds in the center and a raised bed bordering the entire garden with 2ft. wide walkways except by the gate (3ft. to accommodate a garden cart for hauling mulch, etc.) for a total of 380 sq. ft. of gardening space.

To be ready for planting in the spring of 2014, we started working on the project during the late summer of 2013.

As always with gardening, the beginning is the most difficult part- so much work with not much to show for it. The first step was marking off the area and digging up the grass. We rented a sod cutter from Home Depot for $65. Worth. Every. Penny. It was still a lot of work, but nothing compared to doing an area of that size by hand.


Next we laid a thick layer of cardboard over the entire area. This is an inexpensive way to keep down weeds and keep the grass from growing back.


We framed up our five center raised beds using lumber we had gathered over time from the 90% off section at Home Depot. For the center beds we used cedar fence boards and for the outer edge beds we used a combination of landscape timbers and 2x4's. We ended up spending only about $30 for all of the wood needed.


Once the raised beds were framed up, we placed them in the layout and spaced them to accommodate walking space between each.

The chickens are very curious about what we are doing!

  Next we started filling the raised beds with compost and mulch. We wanted to avoid buying any dirt if at all possible, but it is difficult to fill over 500 cubic feet of area with your own backyard compost. We had been building up our compost pile for almost a year in anticipation and were able to fill the five center beds at once. 

You can see what used to be my vegetable garden in the foreground, and the new garden in the back.

Next we build a fence around the garden area to keep out the chickens. Very important! Chickens will eat up a vegetable garden as fast as it can grow! We used the pre-assembled picket fence panel from Lowe's. They cost $30 for an 8ft. piece. Instead of using concrete for the posts, we used the packed earth method around 4x4's and were really pleased with the stability of the outcome. We could have saved more money by going with a more rustic fence made of palettes, but I just like the look of a picket fence! We only needed 6 fence panels since we already had a hurricane fence on one side and the house on another. The fence, gate and hardware ended up costing about $200.


A family member had been getting rid of hundreds of these cement cylinders for free, so we laid them along the inside of the fence base to keep the dirt in and the grass and weeds out of the edge gardens.We were glad to get these for free!

Next we framed up the edge gardens and screwed them together to form the border beds. We hadn't built up enough compost since the last batch to fill these up. The Lafayette Utilities System offers free truckloads of mulch for gardening so we picked up a truckload of that to fill the edge gardens. While it is mulch that hasn't broken down completely yet, we were able to cover it with compost with some time to spare to help it break down into rich soil before we planted.


I put up chicken wire around the inside of the picket fence all the way around to keep out any critters that would want to squeeze between the fence boards. (chickens, *cough*) A 50' roll of chicken wire cost $25.


Originally I had used another truckload of mulch for the pathways, and was content to pull a few weeds growing between the gardens. 


That is, until I ran across a great find at a yard sale. A whole stack of bricks for $60! We spent the next three weekends laying bricks and now have brick pathways between the raised beds. If I had known that there would be bricks, I would have bricked first and built the gardens in after to make all of the dimensions fit together just right, but the few gaps we have give it character :)


Finally, the fun part! We put in all of our plants and began the work of growing, harvesting, and cooking! To go from a drawing on paper to the final product was amazing! We are so excited about how our new garden turned out. Soon I will be posting how we did on our harvest.

Here is the final breakdown of how much we spent:
Sod cutter rental: $65
Wood for raised beds: $30
Fence panels, posts, and gate hardware: $200
Chicken wire: $30
Bricks for pathway: $60
Final Cost: $385

A few more pictures of the finished result. It is hard to get a good picture of the whole garden in one...


Do you have a vegetable garden that you love???

Easy way to keep cats from digging up your plants


All of my neighbors have cats, and since we do not, our yard is the free territory that they all fight over. And when I get my gardens ready for planting seeds at the beginning of the season, I'm sure that my raised beds look like huge upscale litter boxes with the cats' names written all over them. There is nothing quite as frustrating as finding groups of cat potholes in a freshly planted seedbed. Even plants bought in six-packs don't stand a chance against a cat excavation.

After lots of different experiments, I have found a simple way that works really well! And it uses supplies that you probably already have sitting around your garden shed.

Simply take metal garden edging and lay it down flat over the soil. The seeds will grow up through the wide holes and the metal is too annoying for the cats to try to dig around.


 I already had some on hand from various gardening projects, and then I found some more marked 90% off at Hobby Lobby when they clearanced out the spring section. Love it when that happens! 


If you have a larger area to cover, cucumber trellises work really well. This wire trellis is just the right size for my raised beds.


As you can see, the plants simply grow up through the holes. Just remember to pull the trellis up before the plants get too big, or it will be stuck there until it is time to pull the plants up.


You can also use chicken wire that has wider holes. I have been using this method for a while now, and the cats will literally dig in the ONE SPOT that I don't cover. But all of my little seedlings come up right where they should :)

Do you have any other tips and tricks for keeping out the cats?

Garden Fresh Basil Mint Pesto

Oh, how projects get started...Someone asked a question on one of the other posts about drying mint,
      ...which made me think about all of the mint in my garden that I haven't used ONCE yet this year
          ...which made me google what I could do with all this mint
               ...which is when I ran across a recipe for a pesto made with mint!


I get to use more basil and the mint at the same time? Score! The recipe also calls for sunflower seeds, and I just happened to have a sunflower ready to be harvested. Love it when that happens!


As you can see, the birds have already been munching on my sunflowers, and I was planning on giving the rest to the chickens. They will be disappointed that I found this recipe. So, I gathered the sunflower seed into a bowl.


The I harvested the mint and basil (making sure to pick extra as a treat for the rabbits- it is so easy to get side-tracked when playing in the garden). By the way, I do not recommend for anyone crack open all of the little sunflower seed shells to get the seeds out. It takes forever, and my fingers still hurt. Next time, I will give the sunflower seeds to the chickens and buy the seeds already shelled even though it was fun to use our own seeds.


The recipe goes together quickly and I love how it turned out. It uses very little oil, which makes it light, and the sweetness of the mint balances out the slightly bitter taste of the basil for a great combination!


If you want a pesto to use with pasta, I recommend the Basil Parsley Pesto, but if you are looking for a dip for crackers or veggie chips, this is the one!


I found the original recipe on the Meghan Telpner Nutritionista's blog, and then tweaked it a little.

 Basil Mint Pesto
1 1/2 cups fresh basil leaves
1 1/2 cups fresh mint leaves
1/4 cup sunflower seeds
1/4 cup pecans, toasted on 350 degrees for 10 minutes
3 garlic cloves, minced
2 teaspoons lemon juice
1/4 teaspoon salt


Mix all of the ingredients together in a blender or food processor. Yep, it's that easy!

What else do you use mint for???


Homemade Basil Parsley Pesto Recipe


Stop the madness! How can throwing a few seeds in an empty spot in the garden turn into my raised bed being overrun by basil?! 


Okay, so it's not all that dramatic, but I do hate to see anything go to waste, and I have been scrambling to keep up with the enormous harvest of basil that I have had this year. After drying much of it to use throughout the year, I still had more that I knew what to do with. 

I had looked at different pesto recipes, but most of them call for pine nuts, which are ridiculously expensive. If I have to spend that much money to be able to use up my fresh harvest from the garden, it kind of defeats the purpose. When I was sharing this problem with my mom, she shared her pesto recipe that doesn't use pine nuts! I'm not sure where she got it, but I'll share it with you :)


Homemade Fresh Garden Pesto
Ingredients:
2 cups fresh basil leaves loosely packed
2 cups fresh parsley leaves loosely packed
7 cloves garlic chopped
1 1/4 teaspoon salt
1 1/4 teaspoon pepper
1 1/2 cups olive oil

Puree all of the ingredients together in a blender or food processor. It will keep in the refrigerator for a few weeks, or you can freeze it to use when needed. If you do freeze it, make sure to let the mixture sit in the refrigerator for at least an hour before freezing. The recipe makes one pint jar.


I had more basil than parsley, so I used 3 cups of basil and 1 cup of parsley and it still turned out great. Also, I decided to freeze some of mine in an ice cube tray and then put the cubes in a freezer bag so that I could thaw the pesto in serving size portions. I can't wait to use this to make a chicken pesto sandwich or simply mix with spaghetti noodles for a refreshing summer meal. 

How do you make your pesto and what do you use it for?

Baby Rabbits! For meat???

Please don't think that I am a horrible person. If you had told me a year ago that I would be breeding meat rabbits, I would have laughed at you. I'm no bunny killer! Unfortunately, I have discovered that having a little urban homestead and seeing just how self-sufficient we can be on our own backyard is addictive.

We haven't bought eggs from the grocery store this year,
we haven't purchased chicken since last October,
we grow most of our own vegetables and some of our fruit,
so as we consider what we still buy but don't want to, I think of ground beef.

I'm too cheap to pay $7.50/lb for grass fed beef at the farmer's market, but it turns out that rabbits are a lean meat that is very healthy and and easy to raise in a small area. Besides, rabbits are quiet, create the best fertilizer for the garden, 90% of their diet can be greens from the yard, and they multiply like, well, rabbits. The meat can be stewed or ground up and used as a replacement for beef or chicken.

And that rationale was the reason that we bought a male and female New Zealand rabbit. At six months old we bred the rabbits and one month later we were thrilled to see seven little babies in the nesting box!

They are about a week old here, the fur is coming in, and the little ears are the only thing that makes them look more like a rabbit than a hamster.


After ten days they open their eyes for the first time to see and explore the world.


By two weeks old they are already eating greens from the garden on their own and learning to drink from the water bottle. 


At three weeks old we decided to let them play in the yard and meet our chickens. Our chickens were much more scared of the rabbits than the bunnies were of them, but they had a fun time playing together.


What I like most about having rabbits in general is that they are the best composters ever! I give them all of the leftover greens from my garden whether it is carrot and beet tops, finished plants that need to be pulled up, or even leaves and branches from tree and shrub trimmings. In return I get great fertilizer for the garden, and eventually meat as well. I love it when nothing goes to waste!


Look at that cute bunny! Could I ever eat that cute little bunny???

Our first set of babies will now be three months old in a week, and we have a new set of babies playing in the nesting box with mom. The usual age for rabbits to be processed is three months, and I think we will have the courage to go through with our plan of using this homestead investment for meat. I'll let you know how it goes!

What about you? Have you raised meat rabbits? Would you ever try?

Baby Birds!


A few weeks ago I found a delightful little garden surprise. There was a wren's nest built in the top of the weed eater in my shed, along with five little speckled eggs! After watching and waiting (almost as attentively as the mother) I finally heard the little cheep-cheep of the babies last week. Here is a picture of the babies on the day that they hatched.


All head with big closed eyes and wide beaks! A funny way to start out :)

After about a week, they are growing quickly, already growing little feathers and looking around. They are keeping mom busy with their constant demands for food!


 What fun to watch this amazing process! Now I just have to wait until they learn to fly so DH can weed eat the yard again, lol :)

Delightful little garden surprise

One of the things that I love most about playing in the garden is the delightful little unexpected surprises that come my way, sometimes even out of a former "mistake". Our shed has been settling unevenly and the doors no longer close all the way. The project is not at the top of the list, so it has stayed that way for several months.

This morning when I went in to get chicken wire (to fix an issue with the chickens' great escape- a story for another day...) a little red bird flew out of the shed just inches away from where I was reaching. I looked inside the roll of chicken wire and didn't see anything, but as I pulled it out, I saw that the birds had built a nest just beneath in the cover of the weed eater of all places!

Here is the nest all cozy in the top to the weedeater.

A closer look at this little bird's handiwork. 

When I peeked inside, guess what??? Five tiny speckled eggs! I hope the mother doesn't feel too intruded upon to finished her egg hatching. What a fun day in the garden!


There are little miracles all around us every day if we stop to take the time to appreciate them :)

To read the rest of the story, click here.

In the beginning...

I love starting projects, and I seem to always be in the middle of creating something new, especially in the yard. All of these projects start with LOTS of internet research, and after getting a lot of good tips from bloggers and forums, I can't help but begin my own! Maybe someone can gather a bit of helpful information from it, or I can at least look back to learn from my own mistakes along the way :)

One of my newest endeavors is backyard chickens!


Here is our little flock of seven Buff Orpingtons. This is their first day with us, and they are about two weeks old. They are so soft and sweet!


The chickens have to stay indoors for a few weeks or until the weather gets warm enough for them to handle it. They are supposed to stay in their box, but we have several who are much too social for that!


Having smelly chickens in the house was a great motivator for us to finish the coop as soon as possible. But once we moved the chickens out, they missed being inside with us. Our parrot, however, was very happy to have the house back to himself.


Now that the chickens are out of the house, they love to free range in the backyard, especially the mulched gardens.

A few observations as a new chicken owner:
1. They are SO low maintenance! I open the chicken coop door in the morning, let them free range in the yard all day, and then at dusk they go back into the coop on their own. I count their fuzzy heads and close the door for the night. I check to make sure their food and water containers are filled, and that's it!

2. They have personalities. My chickens are very social, have distinct characteristics, and are always up to the funniest antics. They follow my husband and I around the yard, and come when called (unless distracted). I was not expecting such fun from a bunch of chickens!

3. They like to eat garden plants. This was a disappointing discovery. I love to garden and spend a lot of time working with my flowers and vegetables, so I was horrified to see that they had eaten every green leaf off of my kiwi vines and strawberry plants, not to mention eating portions of my lettuce, kale, dahlias, jasmine, and others. They also like to take dust baths in the mulch, which means mulch gets flung everywhere! This also causes a problem with direct sown seeds as they get dug up and flung out of the beds as well. I would fuss at them, but they are just too cute! I have a feeling I will be a terrible mother one day...

4. They eat like pigs! They eat everything in sight! Bugs, plants, leftover food, you name it. They are constantly pecking, tasting, devouring. Maybe they will slow down once they have finished growing, but at this rate they are eating us out of house and home!

To read more about this flock, click here.