Pressure Canned Rabbit Vegetable Soup

Too much food! When I first started homesteading, I never thought I would have this problem, but right now we have so much produce coming in that I am overwhelmed! The easiest way to deal with excess is to freeze it, but our freezer is full to overflowing, so it is time to start canning. Canning is time consuming, and it can be a long process with a lot of steps depending on what you are making, but I can't tell you how wonderful it is to pull out a can of pre-prepped food to use later. I WILL remember to thank myself for all of this hard work later! 

I decided to use up some of the meat and vegetables in the freezer to can a chicken noodle soup- except we raise rabbits for meat (and chickens for eggs), so in this case it is a rabbit noodle soup. Also, canning noodles is a no no, so we also leave out the noodles and simply add them in when we are ready to eat it. So really we are canning a rabbit vegetable soup.

Here is what you need:

- 3.5 quarts chicken stock (I used homemade rabbit stock)

- 4 cups rabbit, chopped

- 2 cups carrots, chopped

- 1 cup celery, chopped

- 1 cup onion, chopped

- 1 tsp salt

- 1/2 tsp pepper

- 1 tbsp garlic, minced

- 1 tsp basil (you can add whichever herbs you like)

Dump all of you ingredients into a large pot and simmer for about 20 minutes to blend all of the flavors together. This sounds quick, but all of that chopping takes time... 

Next use a slotted spoon to ladle the chicken and veggies into sterilized quart or pint jars. Fill each jar about halfway and then fill the rest of the way with broth, making sure to leave one inch of headspace in each jar. 

Put on the lids and rims, and process in a pressure canner for 75 minutes for pint jars or 90 minutes for quart jars. This recipe makes 4 quarts.


Houmas House Plantation Gardens

DH was so sweet to take me on a day trip to visit the Houmas House Plantation and Gardens outside of Baton Rouge for my birthday! I love touring old plantation homes- the history, the odd contraptions they used to solve problems we never think about today, and the large self-sufficient estates. But the Houmas House was so much more than a usual tour because of the incredible gardens, and of course, I'm a sucker for breathtaking landscaping because I can appreciate how much work goes into it!


I wish I had gotten better pictures, but I wasn't planning on blogging about the trip until later thinking back on how wonderful the visit was! So just know that these pictures do not do justice to the beautifully crafted jungle of plants that cover the grounds.

The main house has an 8 oak alley. It used to be 24 oak but most were destroyed to make way for a levee along the Mississippi River. The gorgeous oak trees are literally all over the property, setting the frame for the gardens. The oldest trees span in age from 300-600 years old.


The oak tree all the way to the left has what looks like a fancy bird house it in, but it actually houses a huge bee hive where they make their own honey to sell in the gift shop. Love that!


A central circular pond is surrounded by 4 quadrants of gardens that include the vegetable gardens, vine covered walkways, formal gardens, and water gardens.


There are formal gardens with the typical trimmed hedges, symmetrical lawns, and Greek statues.


 The formal gardens have nooks and crannies with quaint seating areas, and even the flower gardens are dotted with edible plants such as dill, artichoke, broccoli raab, cabbage, and kale.


Does this picture look familiar??? Look closely... 


That's right, it is Monet's Water Lilies and Japanese Bridge paining! It even has a Japanese tea house from the top, from which the view is even more of a likeness to the painting. To see this reinvention of the well-known painting is like seeing art come to life! This pond and waterfall is just one piece of the elaborate water gardens that have fountains, flowing streams, and waterfalls that flow into a seeing of pools and koi ponds graced with Louisiana irises and water lilies. Simply breath-taking!


The vegetable gardens were fascinating to me! They use all of the food that they grow in the vegetable gardens in the kitchen for use in the restaurants on the property, which I love. 


They had gotten 11 inches of rain the week that we visited, so you will notice the water still puddled between the rows of vegetables.


The trellises are all formed from intertwined branches and vines creating an artistic yet natural look.


While the vegetables have an overgrown, natural look to them with interplanted crops and curved rows forming a variety of shapes and designs, there is still a visible order and intentionality to the plantings.


I also recommend the tour of the house. The view of the gardens and the property from the second story balcony and fantastic!


Overall, I wish I would have taken a thousand more pictures! What I have are the few that I quickly snapped at the end. I guess that is the sign of truly living in the moment and enjoying it- being so present where you are that is doesn't occur to you to preserve it for later. I hope you have the chance to visit. You will not be disappointed!

Small Space Vegetable Garden Techniques: Intensive Gardening

If you are like me and have a small space for your vegetable garden, or just want to get more out of the space that you have, an easy way to fit more plants in less space is to change the arrangement. When it comes to the vegetable garden, it becomes a game to see if I can increase production each year by learning new techniques, and I can get a little obsessed with getting the most I can out of the area. That's when the diagrams come out to find the most strategic plant arrangement possible...


Traditional gardens use rows with unused garden space between each row of plants for walking. Unless you have a large garden area, the rows in between the plants wastes a lot of gardening area. An average 3x6 foot garden planted with the traditional row arrangement will fit only ten plants that all for 12 inch spacing.
Another method commonly used in raised beds and backyard vegetable gardens is the square foot gardening method. In this method, the gardener lays out a grid in the garden with each square in the grid measuring one square foot. Therefore, in a 3x6 foot garden, you would be able to fit 18 plants. While this arrangement is a much better use of space, there are still unused areas in the corners of each of the squares that are not utilized.

Intensive gardening still follows the suggested plant spacing of 12 inches, but staggers the rows of plants to make use of the lost corner space in square foot gardening. The spacing for plants in this arrangement are measured at an angle, allowing even more plants to fit in the area. This 3x6 garden will hold 23 plants that require 12 inch spacing! 

More plants means more produce, and more produce means more yield from the space that you have. This is just one of many ways to increase your yields, but it is a very simple technique to implement in the backyard vegetable garden. I hope you have a very productive vegetable garden this year!

Vegetable Gardening Tips for the Deep South


Alright, this is a post for all of my vegetable gardeners in the south! If you have ever read the back of a seed packet that says "direct sow as soon as the ground can be worked in the spring" and thought to yourself "what does that mean?" then this post is for you! There is a beautiful area of the United States where the temperatures rarely drop below 30 degrees F, where January can feel like a mid-spring day, where the soil never freezes, and most importantly, vegetables can truly be grown year-round without much extra effort. But seed packets and gardening books are not generally made with the deep south in mind, so here are a few changes to make when planning your vegetable garden for zones 8-10 :)

1. Don't plant cool weather crops in the spring.
There are many early spring crops that just don't have a long enough growing period before the hot weather sets in if they are planted in the fall. My suggestion is to put out cool weather plants such as broccoli, cauliflower, carrots, cabbage, brussel sprouts, lettuce, etc. into the vegetable garden in September so that they can mature and be harvested in early winter (December- January). There is just no way that you will be able to keep these plants from bolting of wilting before harvesting in June if you garden in the deep south. Besides, now that you can plant all of these vegetables in the fall, think of all of the garden space that frees up in the spring!


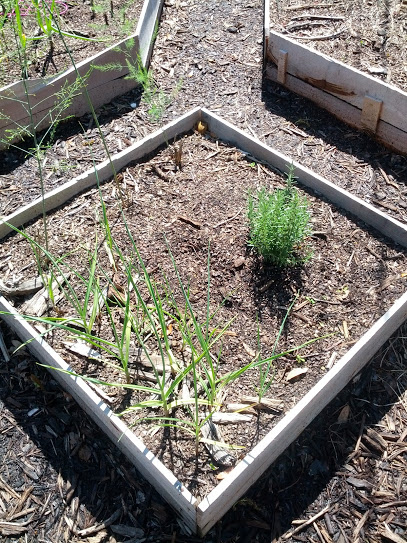
2. Plant fruit trees and perennial garden plants in the fall.
Most garden books will tell you to plant new fruit trees or perennial fruit, vegetable, and herb plants in the spring so that they can be well established before their first cold winter. In the deep south we have a bigger threat to new plants- the summer heat! Plant citrus trees, blackberry and blueberry bushes, asparagus, rosemary, etc. in the fall so that they have all winter to establish before the blistering summer comes.


3. Make adjustments to shade recommendations.
Many plants will be marked as needing full sun, but full sun really means 8 hours of sunlight. Even your full sun plants will find it difficult to hold their leaves up if you have them in direct summer sun for 12 hours. Move plants into areas where they will get part shade if you live in a hot climate, and plants requiring part shade can easily get away with almost full shade. Most leafy greens will thank you for the shady spot in the garden and will be slower to bolt. Also, cool season herbs can be treated as perennials if given shade in the summer.
Make good use of that shady corner of the garden!

4. Get creative with watering solutions.
Plants in hot climates need more to drink. Thankfully in Louisiana we also have a tropical climate with a lot of rain and humidity. Humid climate areas should water their plants in the morning so that the water evaporates off of the leaves and keeps diseases from spreading as easily. Hot and dry climates, on the other hand, should be watered in the evening so that less of the water evaporates during the sunlight throughout the day. Watering can be kept to a minimum if you use  drip irrigation systems connected to rain barrels (or the cheaper version, 2 liter bottles flipped upside down in the dirt with a small hole in the top). Whatever the method, make sure your plants stay well hydrated to make it through the heat wave.

5. Plan your winter break in July and August.
In the same way that many climates are too cold to plant in the most extreme part of the season, the same is true with heat in the south. Some plants thrive in the long, hot summer days, such as eggplant, peppers, okra, and some tomatoes, but most plants just can't handle the heat. Some plants, such as beans, will actually become infertile past 90 degrees F and no longer produce fruit. My lowest garden production isn't in January of February, but in July and August. Plan to take a break during these months and plan for you fall garden, starting seeds inside in the same way that gardeners up north would do in the winter. Besides, if it's too hot for the plants, it's too hot for me...

Pepper plants love the long hot days of southern summers.

6. Start your spring garden seeds super early!
While other areas are waiting for their soil to be "workable", ours plants haven't even stopped growing. I have found that the perfect time to start my new seeds indoors is new year's day. This sounds crazy early for most places, but in the deep south, tomatoes, peppers, eggplant, and more can be started in January, followed by watermelon, cantaloupe, and others in February. One year I was able to start all of my seeds outside in January with no problems, but you will get much better germination results if you start your plants indoors under lights for the first 6 weeks or so.

My tomato plants on January 15.

7. Direct sow more plants than usual.
Plants will grow stronger, healthier, and more hardy if they are direct seeded than if they are started indoors. Many places with short growing seasons don't have the luxury of direct seeding, though. However, since the soil temperature is what determines success in germination, there are a lot plants that will start just fine and develop better when direct seeded in southern vegetable gardens. Some of these plants include peas, beans, cucumbers, squash, zucchini, lettuce, kale, mustard greens, collards, and many more. Do a few tests starting some seeds indoors and then direct seeding more seed at the same time that you put your transplants into the ground. You will be surprised how fast the new seeds catch up to and even surpass your pre-started plants.

Lettuce mix

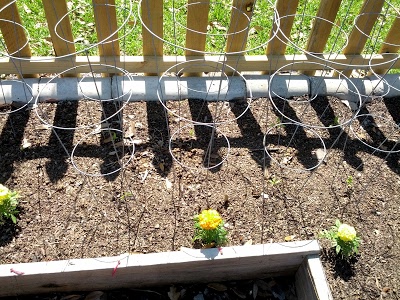
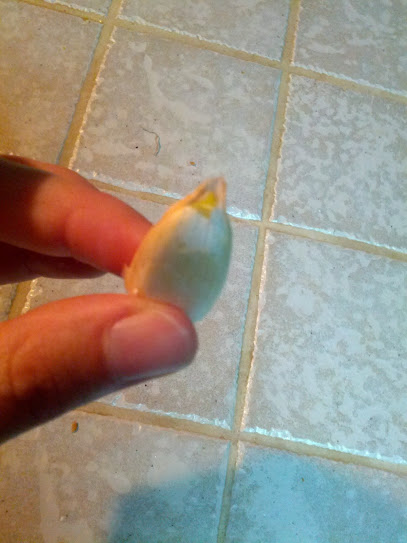
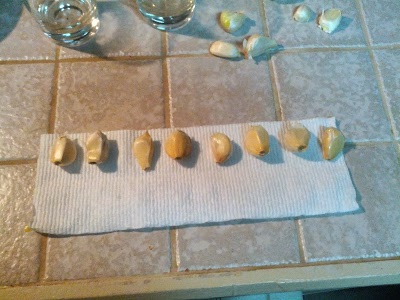
8. Plant long season crops in the fall.
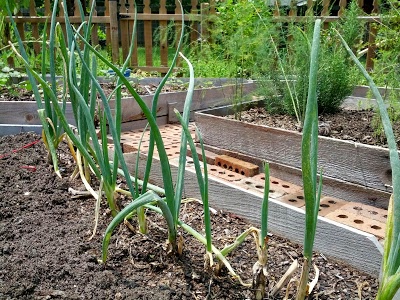
There are many crops that will take up to 6 months or more to fully develop. Some of these include garlic, onions, and potatoes. These will have a much longer period to develop before the heat takes them out if they are planted in the fall instead of the traditional spring timeline. Don't worry, they will overwinter just fine! Besides, it leaves more room in your spring garden for other plants!

Onions
9. Treat some annuals as perennials.
There are many plants that are considered annuals in many areas that will act as perennials in the deep south. Some of these include green onions, collards, kale, and many varieties of herbs such as oregano, sage, and parsley. Other plants, while not perennials in the sense that you plant them once and they grow forevermore, will still grow year round. Some plants that you can plant at almost any time of year (except the extreme summer) include lettuce, carrots, arugula, mustard, beets, turnips, radishes, spinach, and many types of beans. I am continually surprised when I have some extra seeds and an open spot in the garden and decide to give it a shot even though it doesn't match the seed packet timing at all, and it turns out to be a wonderful harvest! You won't know unless you try :)

My parsley plant thriving in the middle of winter.


10. Be prepared for bugs.
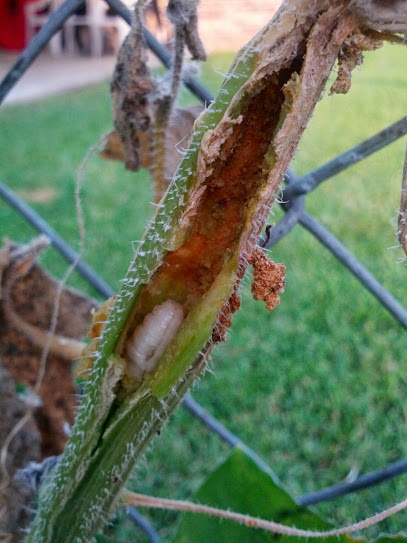
The longer the growing season is and the more mild the winters, the more things survive- "things" being both plants and their pests. Bugs will abound in the southern garden, and the farther into the growing season you are, the worse it gets. This is another reason why you should plant as many of your vegetables as possible in September for a fall garden as the cooler weather will cut down on the pests. Each garden pest brings its own set of challenges, but a southern gardener must be determined and vigilant to stay on top of the many bugs that will come to visit.

Squash vine borers- PURE EVIL!

11. Plant your favorites twice.
We have such a long growing season in the south that many vegetables can be planted twice if you plan it right. You can start any of the following in both spring and fall: tomatoes, cauliflower, broccoli, beans, summer squash, zucchini, kale, lettuce, carrots, beets, turnips, radishes, arugula, cabbage, and much more. I wouldn't recommend planting everything twice, as they will really complicate your crop rotation plans and limit your space. However, if there is a certain vegetable that you just love (for me, bush beans!), then go ahead- plant it twice!

These are just a few things that come to mind, but I'm sure there are many more. 
What else would you add to the list?

Garden Vegetable Cheese Soup


I love vegetable gardening in south Louisiana! Here it is, the end of January, and while the rest of the country is snowed inside, I am harvesting the last of my cauliflower, broccoli, and carrots. (Sorry, I don't mean to brag...) And since the temperatures are beginning to drop, it is a great time for a warm, hearty garden vegetable cheese soup! So if you aren't sure what to do with the last little broccoli side shoots, those stubby end of the season carrots, or that tiny cauliflower head that you thought would eventually get bigger (but didn't), then this is a great recipe to use up the last of your cool season crops!


What you need:
- 2 stalks celery
- 1 medium onion
- 3 garlic cloves
- 4 cups chopped carrots, cauliflower, and broccoli (the proportions of each are up to you or depend on what is left in the garden, and sometimes I add more than 4 cups- you can't have too many veggies!)
- 1/2 cup butter, melted
- 1/2 cup flour
- 3 cups chicken broth
- 1 tbsp. worcheshire sauce
- 1/2 tsp. pepper
- 2 cups milk
- 2 cups shredded cheddar cheese

Put all of the veggies through the food processor to the size that you want. 


Saute the first 4 ingredients in the butter in a 3 qt. pot. 


Add the flour, stir for 1 minute until smooth. Gradually add chicken broth, stirring as you go. Cover and simmer for 20 minutes. 


Add the worcheshire sauce, milk, cheese, and pepper and cook on low for 10 more minutes. 


 All done! Serve with a fresh green garden salad :) Enjoy!


Garden Vegetable Cheese Soup
Ingredients:
- 2 stalks celery
- 1 medium onion
- 3 garlic cloves
- 4 cups chopped carrots, cauliflower, and broccoli (the proportions of each are up to you or depend on what is left in the garden, and sometimes I add more than 4 cups- you can't have too many veggies!)
- 1/2 cup butter, melted
- 1/2 cup flour
- 3 cups chicken broth
- 1 tbsp. worcheshire sauce
- 1/2 tsp. pepper
- 2 cups milk
- 2 cups shredded cheddar cheese

Put all of the veggies through the food processor to the size that you want. Saute the first 4 ingredients in the butter in a 3 qt. pot. Add the flour, stir for 1 minute until smooth. Gradually add chicken broth, stirring as you go. Cover and simmer for 20 minutes. Add the worcheshire sauce, milk, cheese, and pepper and cook on low for 10 more minutes.

Perfect Backyard Vegetable Garden Plan: Feed Your Family Fresh!


Last year my vegetable garden was a 6" high raised bed that was 5' x 15'. It worked for a while, but the soil wasn't very deep since the bed wasn't as raised as much as I would have liked, and a nearby tree had grown so quickly that it blocked the afternoon sun to half of the garden which simply won't work for growing a harvest of summer vegetables. So last year I began designing my dream garden on paper, not really sure if it would ever become a reality. We dreamed big, but wanted to keep it as budget friendly as possible.

I used growveg to make my original garden design. I am absolutely in love with this software! It has made my gardening SO MUCH EASIER! As much as I like researching and charting, this makes the planning a dream! (try the 30 day free trial, and you'll know what I mean!) 

This was the plan for the spring 2014 layout. 28' x 20' with five raised beds in the center and a raised bed bordering the entire garden with 2ft. wide walkways except by the gate (3ft. to accommodate a garden cart for hauling mulch, etc.) for a total of 380 sq. ft. of gardening space.

To be ready for planting in the spring of 2014, we started working on the project during the late summer of 2013.

As always with gardening, the beginning is the most difficult part- so much work with not much to show for it. The first step was marking off the area and digging up the grass. We rented a sod cutter from Home Depot for $65. Worth. Every. Penny. It was still a lot of work, but nothing compared to doing an area of that size by hand.


Next we laid a thick layer of cardboard over the entire area. This is an inexpensive way to keep down weeds and keep the grass from growing back.


We framed up our five center raised beds using lumber we had gathered over time from the 90% off section at Home Depot. For the center beds we used cedar fence boards and for the outer edge beds we used a combination of landscape timbers and 2x4's. We ended up spending only about $30 for all of the wood needed.


Once the raised beds were framed up, we placed them in the layout and spaced them to accommodate walking space between each.

The chickens are very curious about what we are doing!

  Next we started filling the raised beds with compost and mulch. We wanted to avoid buying any dirt if at all possible, but it is difficult to fill over 500 cubic feet of area with your own backyard compost. We had been building up our compost pile for almost a year in anticipation and were able to fill the five center beds at once. 

You can see what used to be my vegetable garden in the foreground, and the new garden in the back.

Next we build a fence around the garden area to keep out the chickens. Very important! Chickens will eat up a vegetable garden as fast as it can grow! We used the pre-assembled picket fence panel from Lowe's. They cost $30 for an 8ft. piece. Instead of using concrete for the posts, we used the packed earth method around 4x4's and were really pleased with the stability of the outcome. We could have saved more money by going with a more rustic fence made of palettes, but I just like the look of a picket fence! We only needed 6 fence panels since we already had a hurricane fence on one side and the house on another. The fence, gate and hardware ended up costing about $200.


A family member had been getting rid of hundreds of these cement cylinders for free, so we laid them along the inside of the fence base to keep the dirt in and the grass and weeds out of the edge gardens.We were glad to get these for free!

Next we framed up the edge gardens and screwed them together to form the border beds. We hadn't built up enough compost since the last batch to fill these up. The Lafayette Utilities System offers free truckloads of mulch for gardening so we picked up a truckload of that to fill the edge gardens. While it is mulch that hasn't broken down completely yet, we were able to cover it with compost with some time to spare to help it break down into rich soil before we planted.


I put up chicken wire around the inside of the picket fence all the way around to keep out any critters that would want to squeeze between the fence boards. (chickens, *cough*) A 50' roll of chicken wire cost $25.


Originally I had used another truckload of mulch for the pathways, and was content to pull a few weeds growing between the gardens. 


That is, until I ran across a great find at a yard sale. A whole stack of bricks for $60! We spent the next three weekends laying bricks and now have brick pathways between the raised beds. If I had known that there would be bricks, I would have bricked first and built the gardens in after to make all of the dimensions fit together just right, but the few gaps we have give it character :)


Finally, the fun part! We put in all of our plants and began the work of growing, harvesting, and cooking! To go from a drawing on paper to the final product was amazing! We are so excited about how our new garden turned out. Soon I will be posting how we did on our harvest.

Here is the final breakdown of how much we spent:
Sod cutter rental: $65
Wood for raised beds: $30
Fence panels, posts, and gate hardware: $200
Chicken wire: $30
Bricks for pathway: $60
Final Cost: $385

A few more pictures of the finished result. It is hard to get a good picture of the whole garden in one...


Do you have a vegetable garden that you love???

How to grow your own garlic


I love being able to know where my produce comes from, and there is no better way than to grow it in your own backyard! One simple thing to grow in a small bed or even a container is garlic. All you need to get started is a clove of garlic from your grocery store. If you would like to grow organic garlic, then start with organic garlic.


Break the clove up into individual segments. 


Each segment will eventually grow into an entire clove of garlic. Keep the paper-like covering on the garlic segments, but peel back the covering from the very top of each so that the leaves can grow more easily.


Fold a paper towel in half length-wise and line up the garlic segments with the tops pointing up. Fold the bottom of the paper towel up to the top to create a little pocket. 


Roll up the paper towel and place it in a shallow glass with the tops facing up. Add just enough water to keep the paper towel wet without creating a puddle in the bottom of the glass.


After just a few days you will begin to see green shoots growing from the tops of each piece of garlic. In a few more days white roots will begin to grow through the paper towel to the bottom of the glass.


Then you are ready to plant! Bury each of the garlic deep enough to cover the entire garlic piece with the leaves sticking up. Plant the segments 6 inches apart in early fall or spring, and most varieties mature after 90 days. 


Happy planting and happy eating! Anyone have a favorite recipe using garlic???


How To: Starting a Raised Vegetable Garden

I decided to extend my vegetable garden last week, so I thought I would take the opportunity to make a quick how-to on putting one together. Starting a raised vegetable garden is pretty simple.

Why make a raised garden?

1. You can get great drainage for the soil, especially good for me in south louisiana where we have swampy ground.

2. You can start your garden off with great dirt rather than slowly building up the natural soil over several years.

3. The weeding is slim to none! (That's a good enough reason right there!)

First, lay out the dimensions of the garden. My extension will be 5 feet by 5 feet. You don't want to make it wider that 5 feet, otherwise you won't be able to reach the plants in the middle unless you make rows, but those waste too much space in a small backyard garden. Once you have decided on the size, mark out the area on the ground and use a flat shovel to dig up the grass.

This really is the hardest part. Digging up grass is no fun and a lot of work, but it has to be done, so just think about all those tasty homegrown vegetables and do it! I have discovered that the easiest way is to dig the shovel in a few inches deep around the whole perimeter and then do the same thing in one foot wide lines across the inside, then peel up each one foot wide section in rows.

If you use this method, the grass should come up in pretty nice chunks of sod that you can then reuse in low or dead spots in the yard.

Give yourself plenty of time and breaks for water, but if you stick with it, sooner or later all of the grass will be gone!

Next, use boards to frame the outside and screw them together at the corners. I use 2x6 treated pine boards cut to the length that I need. Some people say not to use treated wood when planting food, but treated wood is not the extremely toxic stuff that it used to be a few decades ago, so I use it. If it really bothers you, pay the extra money to use untreated cedar. Just regular untreated boards will rot in no time.

If you want to really keep the weeds and grass from growing back, you can line the bottom of the bed with weed fabric. I have noticed that this keeps some of the plants from growing deep roots and producing as well, so I opt for lining the bottom with a layer of cardboard. It kills any remaining weeds or grass and decomposes after about 18 months. I layer my compost and leaves on top on the cardboard, then bagged rich soil, and finally finish it off with top soil. Be sure to fill your raised bed to the top for the best growing conditions. Now all you need are some plants :)